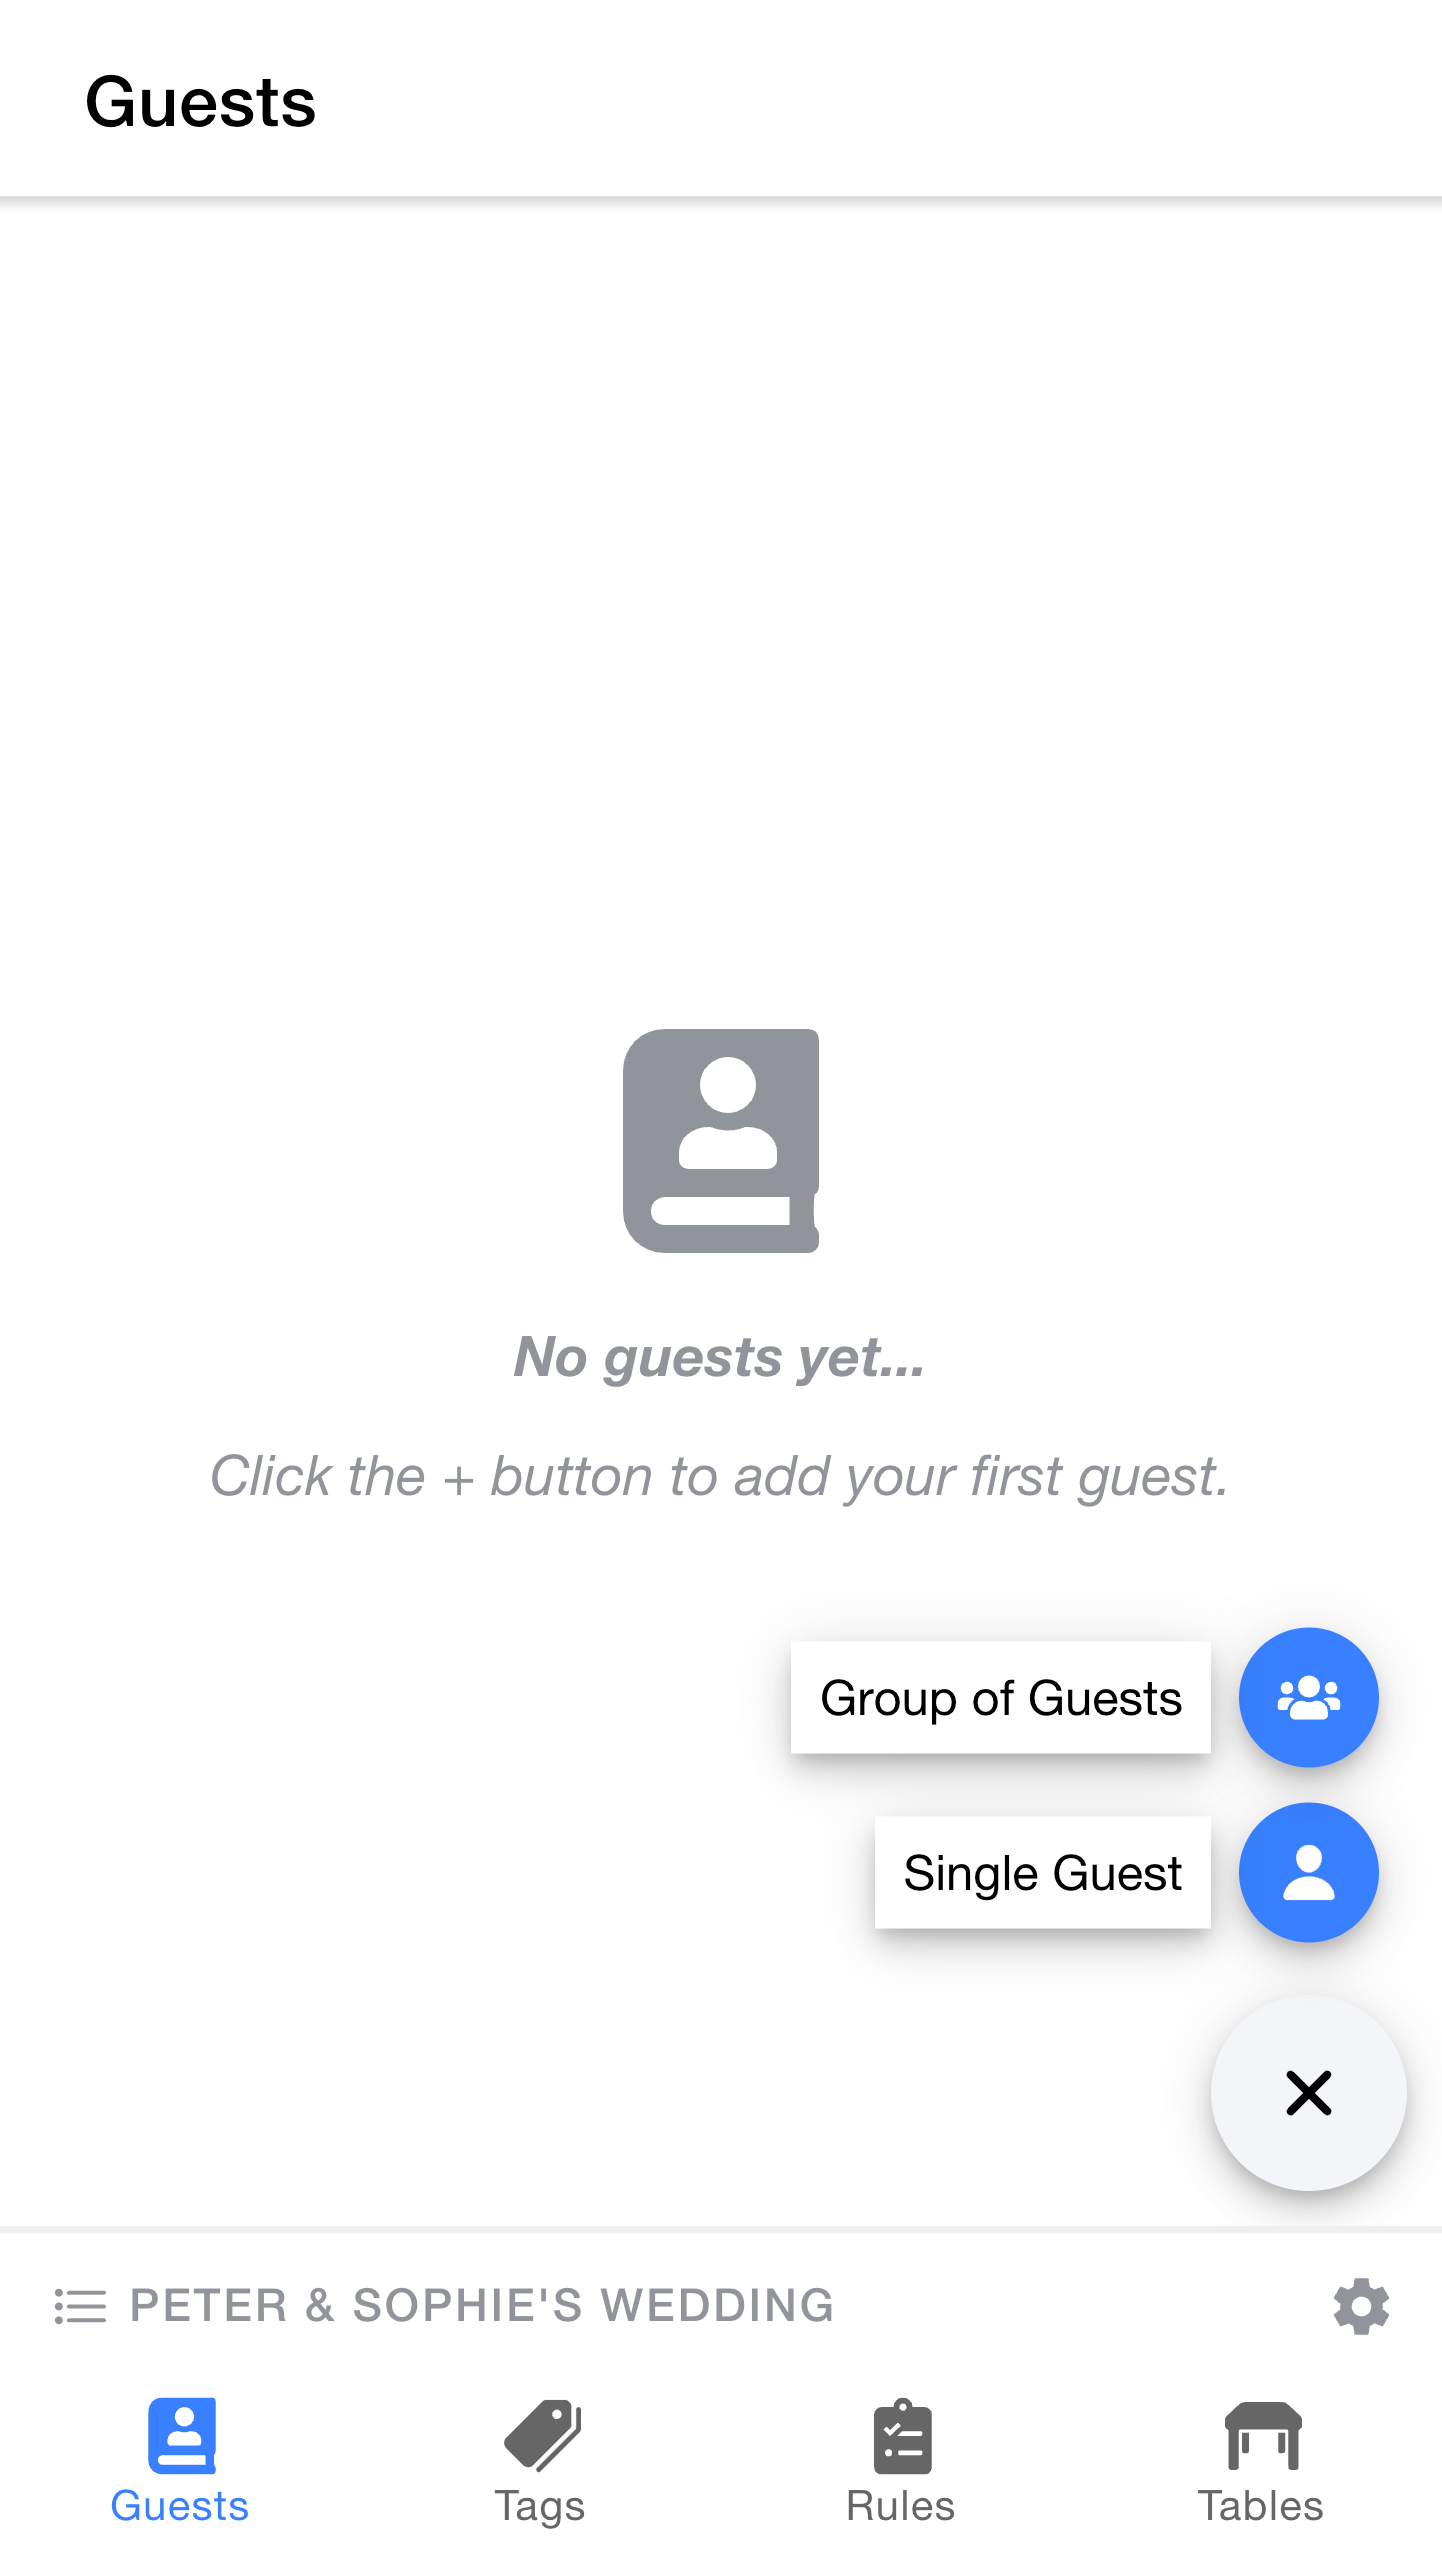
Guests & Groups
Now that we've created an event, our next task is to enter a list of guests.
There are two ways to add guests:
- Creating a group of guests: This is a quick and easy way to add multiple people at once (for example, a couple / family) and easily specify that they should be seated together
- Creating a single guest: Not everybody will be part of a group. Use this option to add a single person.
Don't worry if you want to change things later. You can change which group a guest belongs to at any point.
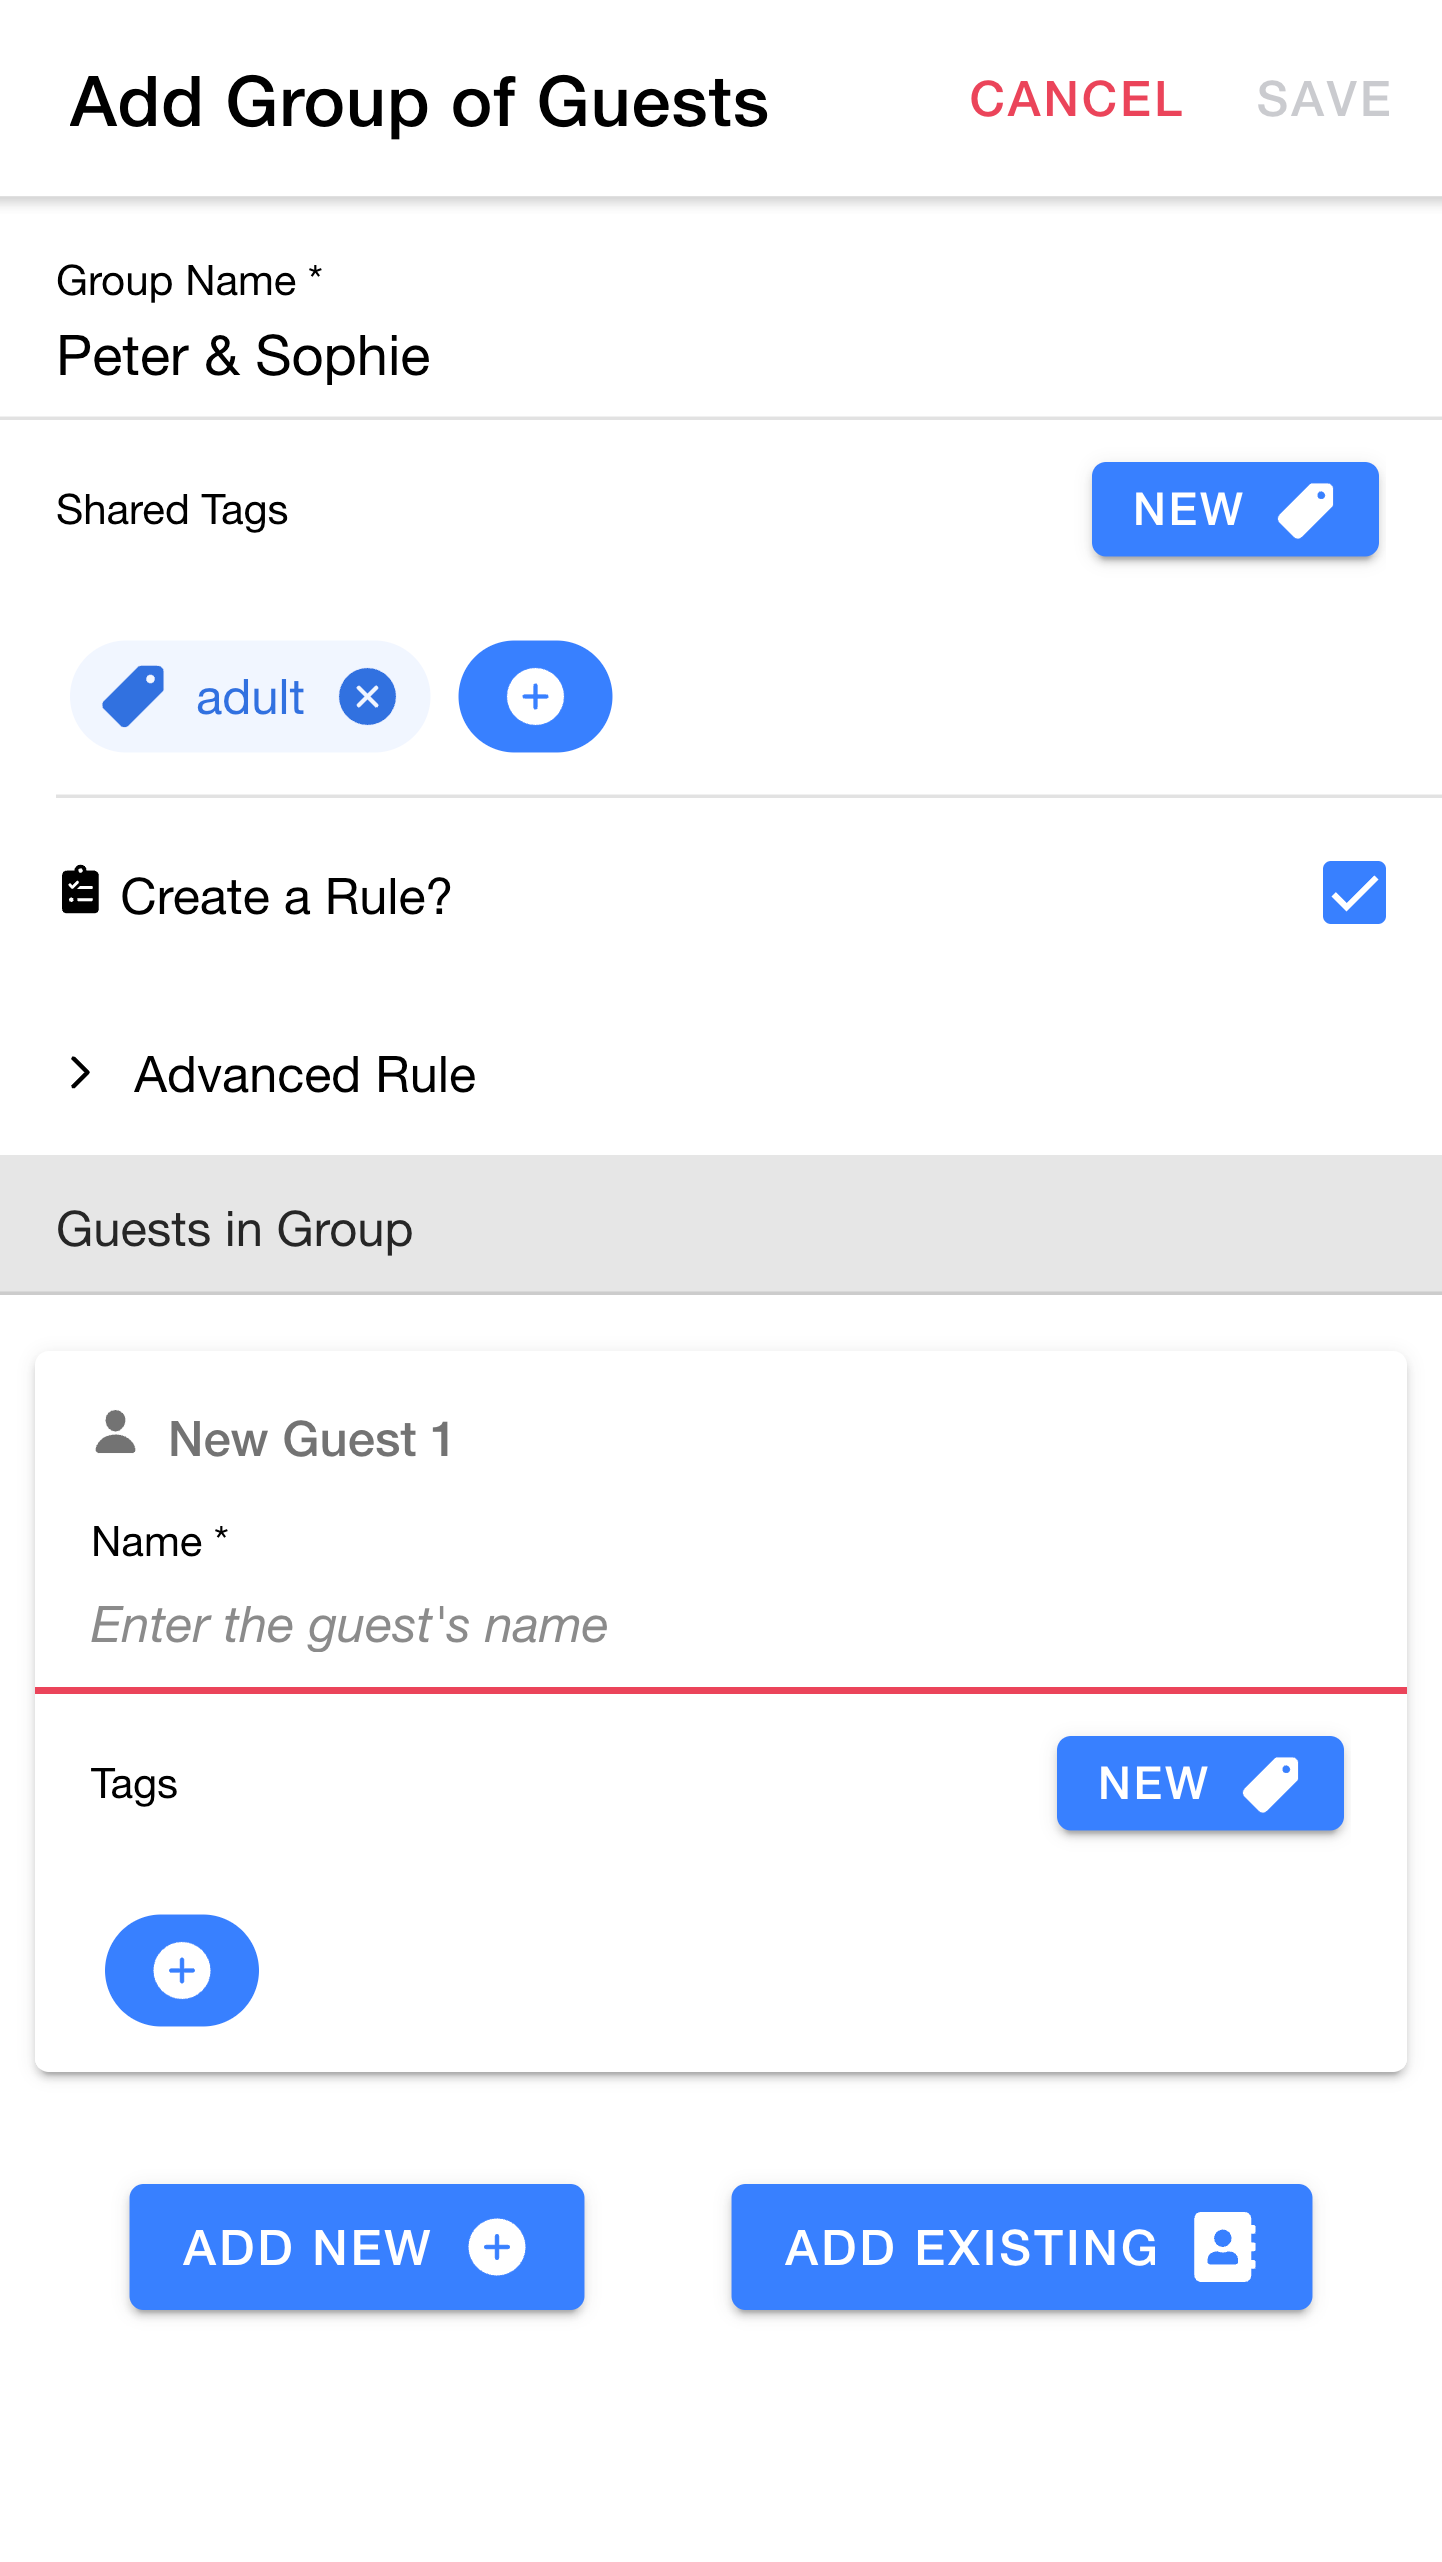
The
Tip: As well as being useful in rules, tags also provide a convenient way to count guests with specific attributes. For example, assigning all guests an
Next we can decide whether or not we want to create a rule for the group. We'll dive into rules in more detail later. For now, leave
If needed, you could expand the
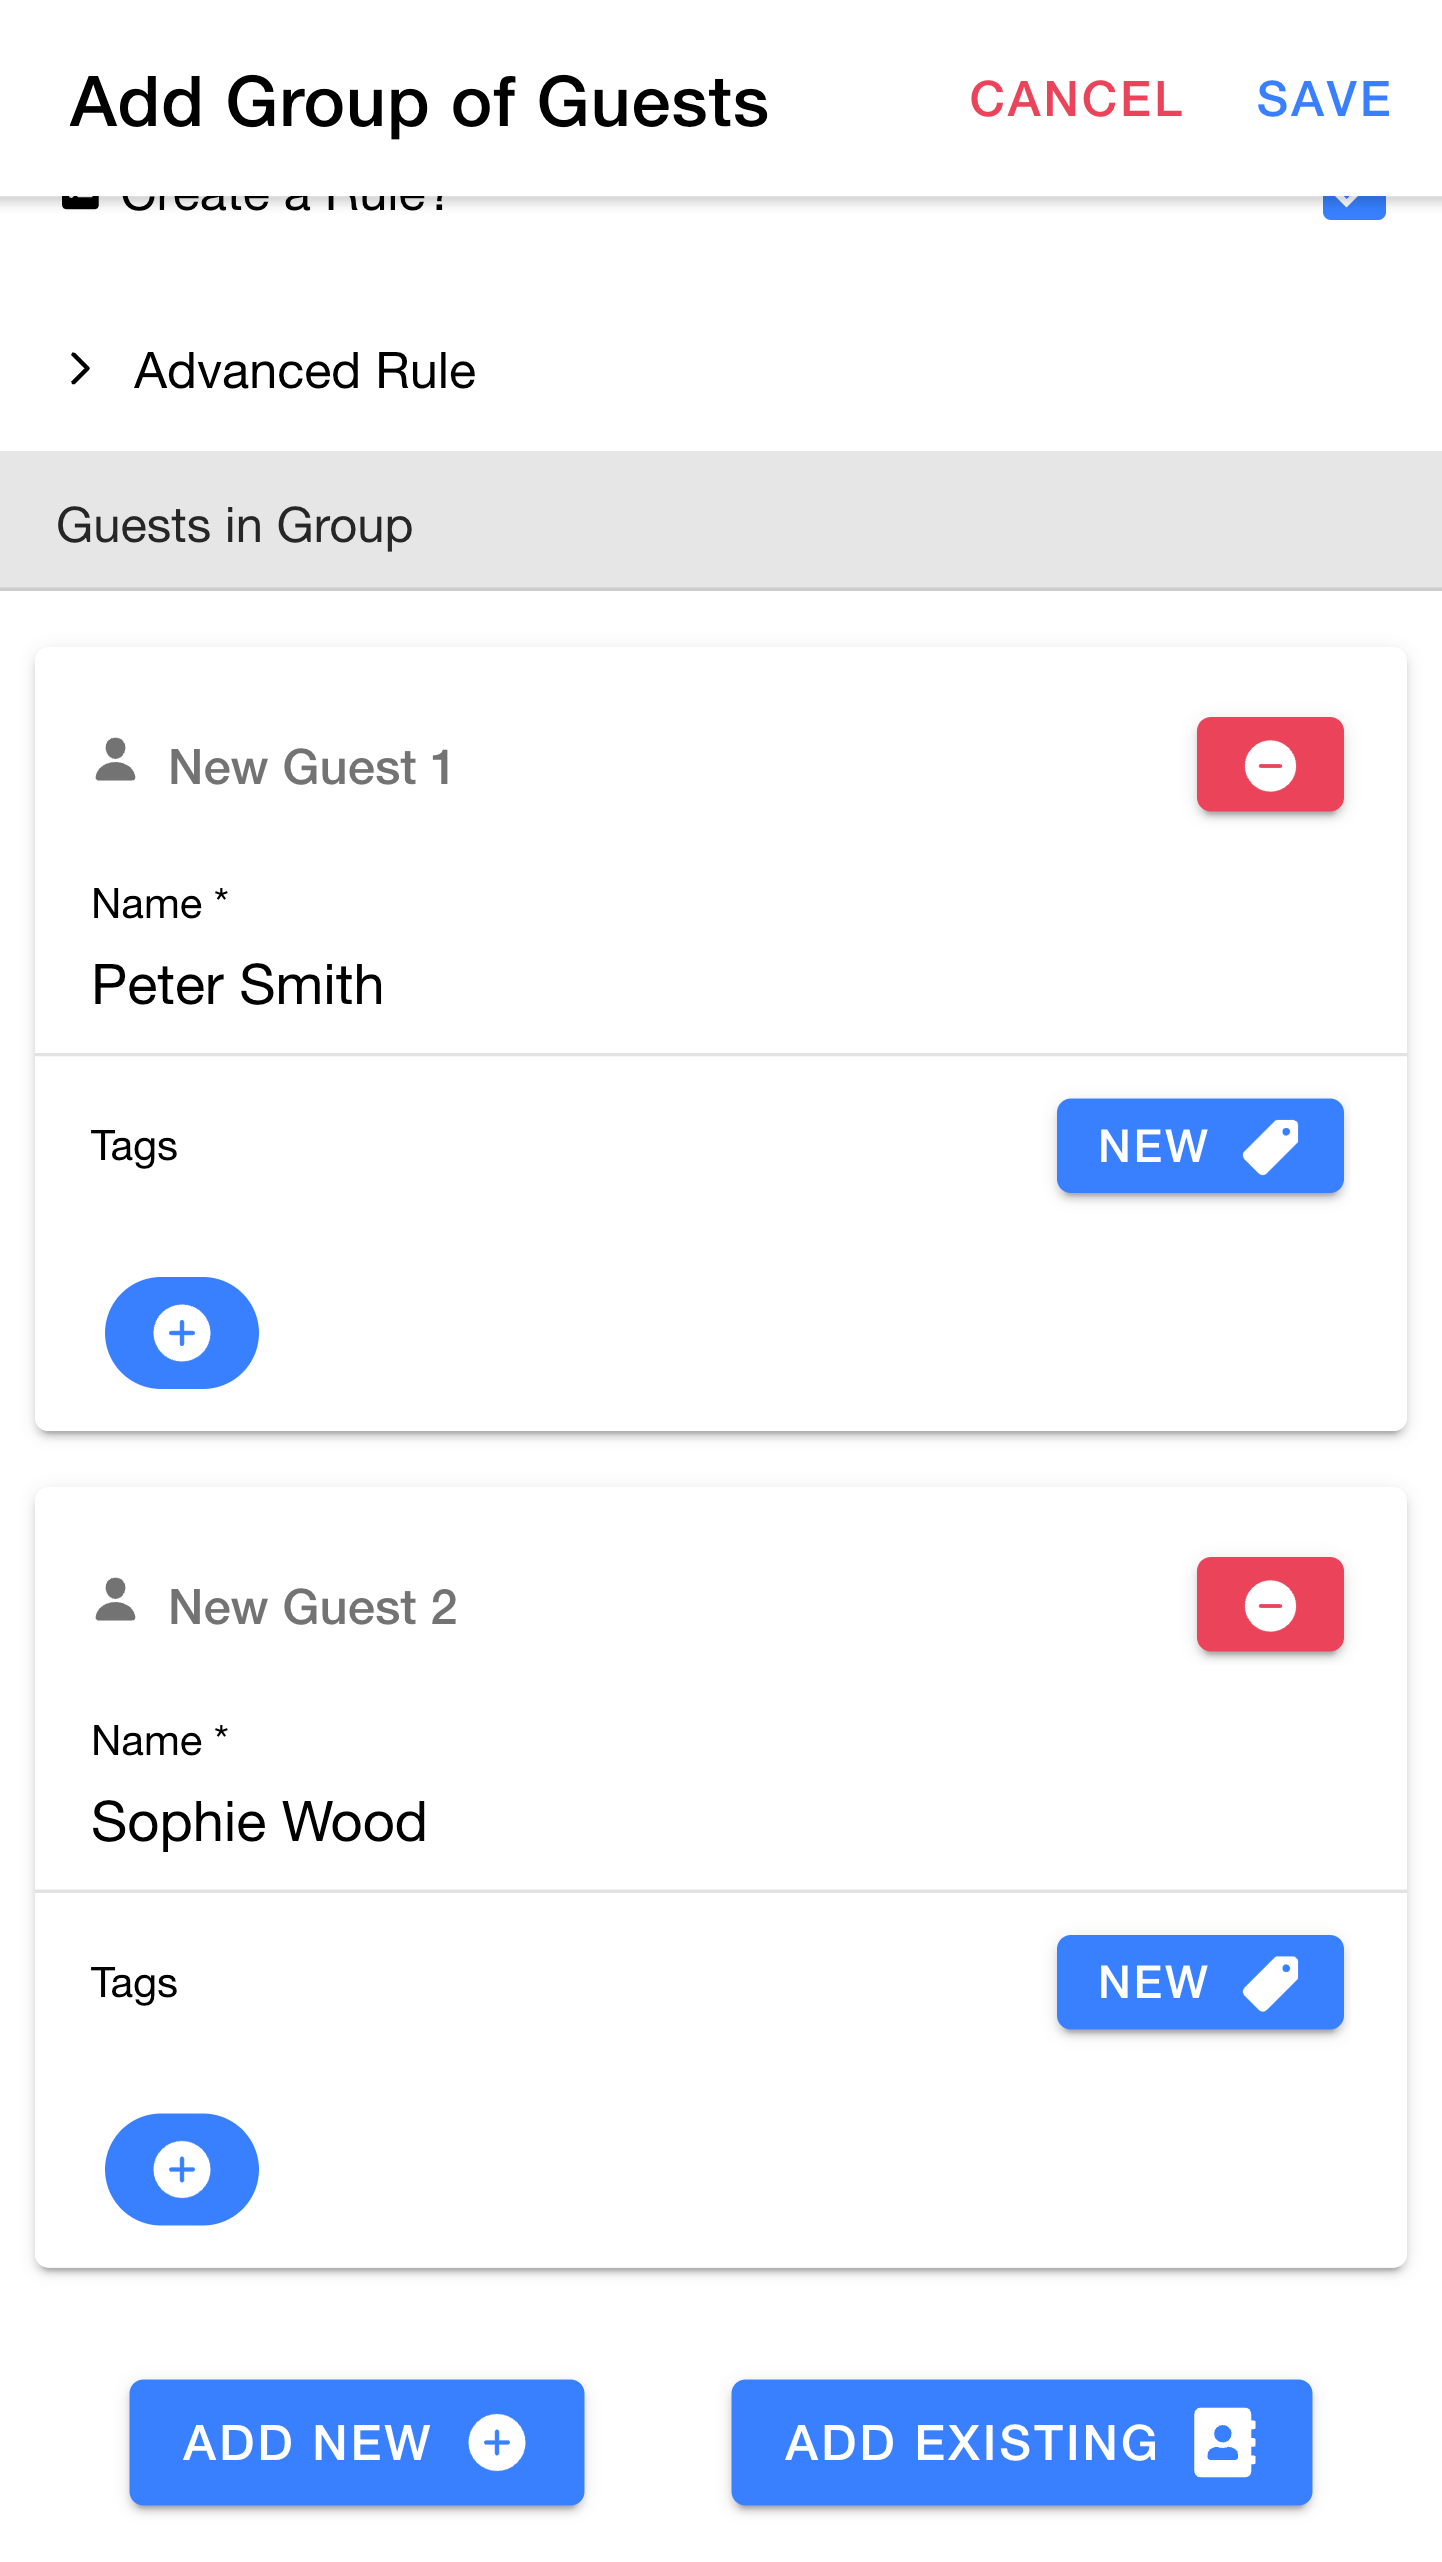
Next, create two guests:
If needed, you can also create (or select existing) tags that should apply to each individual guest. In this case we'll leave that blank.
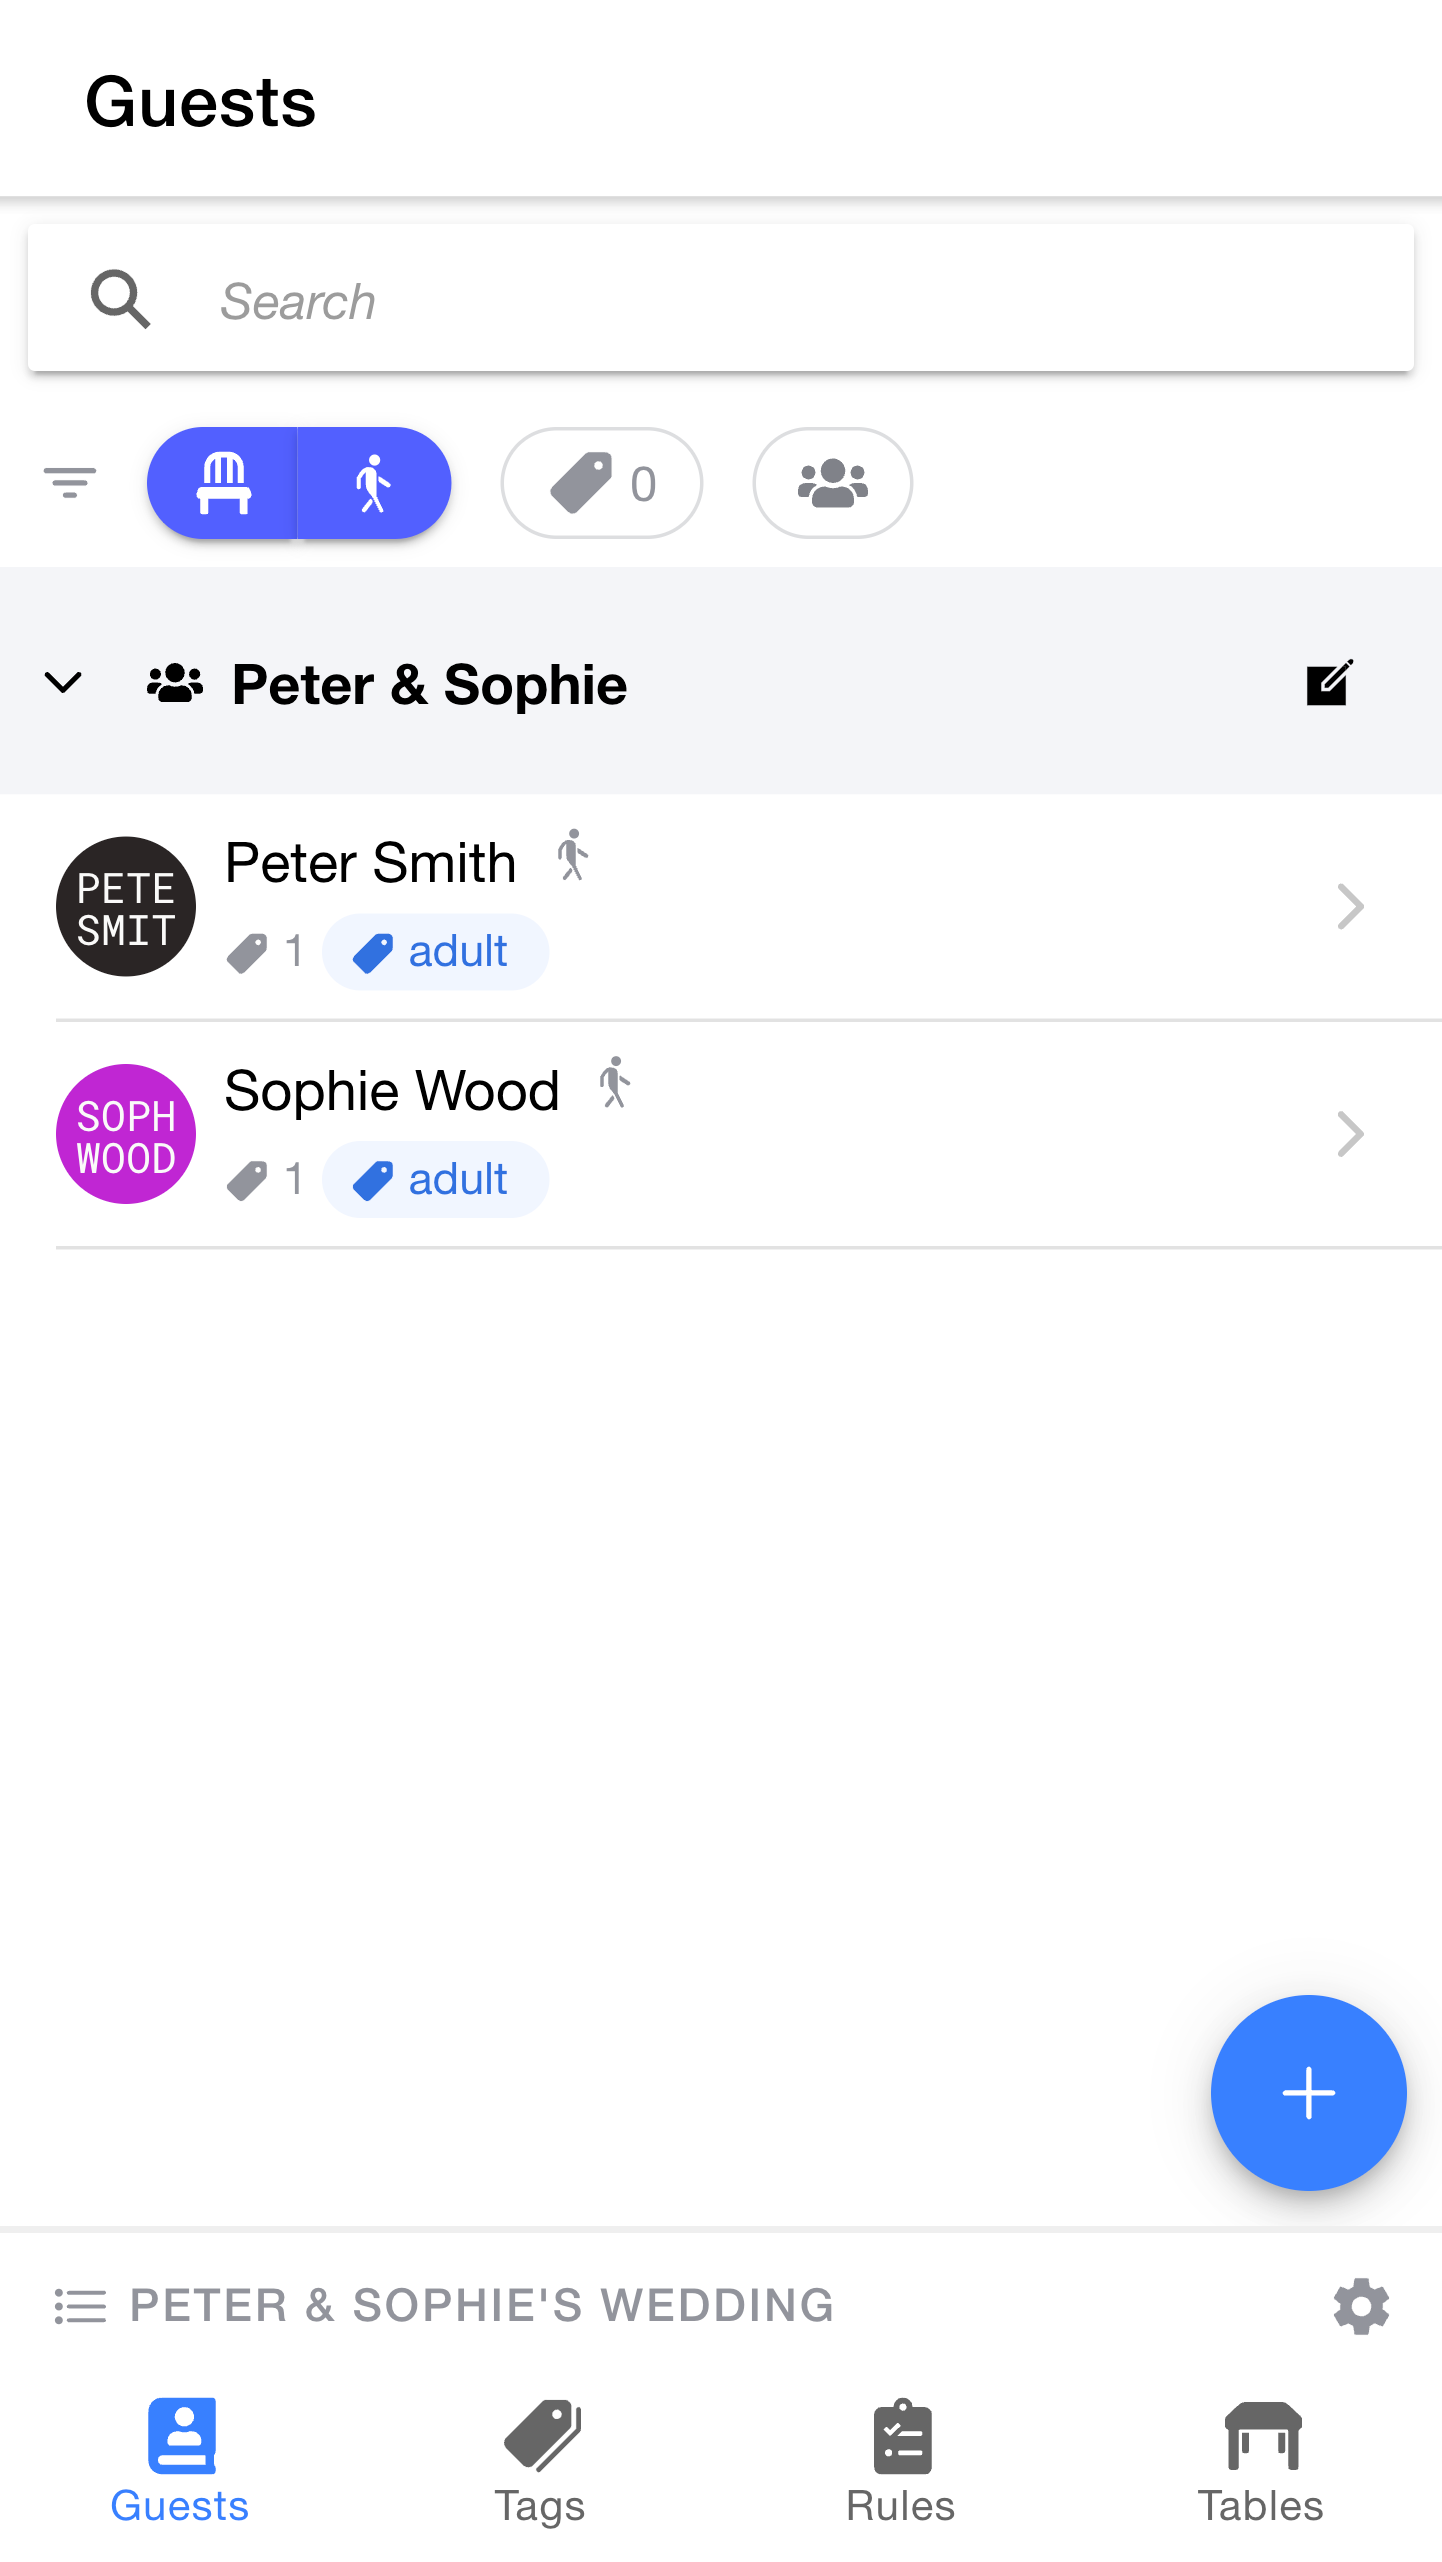
Congratulations, you've created your first group.
The
For now though, let's invite some more guests to the wedding so that Peter and Sophie don't get too lonely.
Note: Don't worry if your avatars show in different colours. Guest colours are randomly assigned for each new guest, so that they're easy to distinguish from each other.
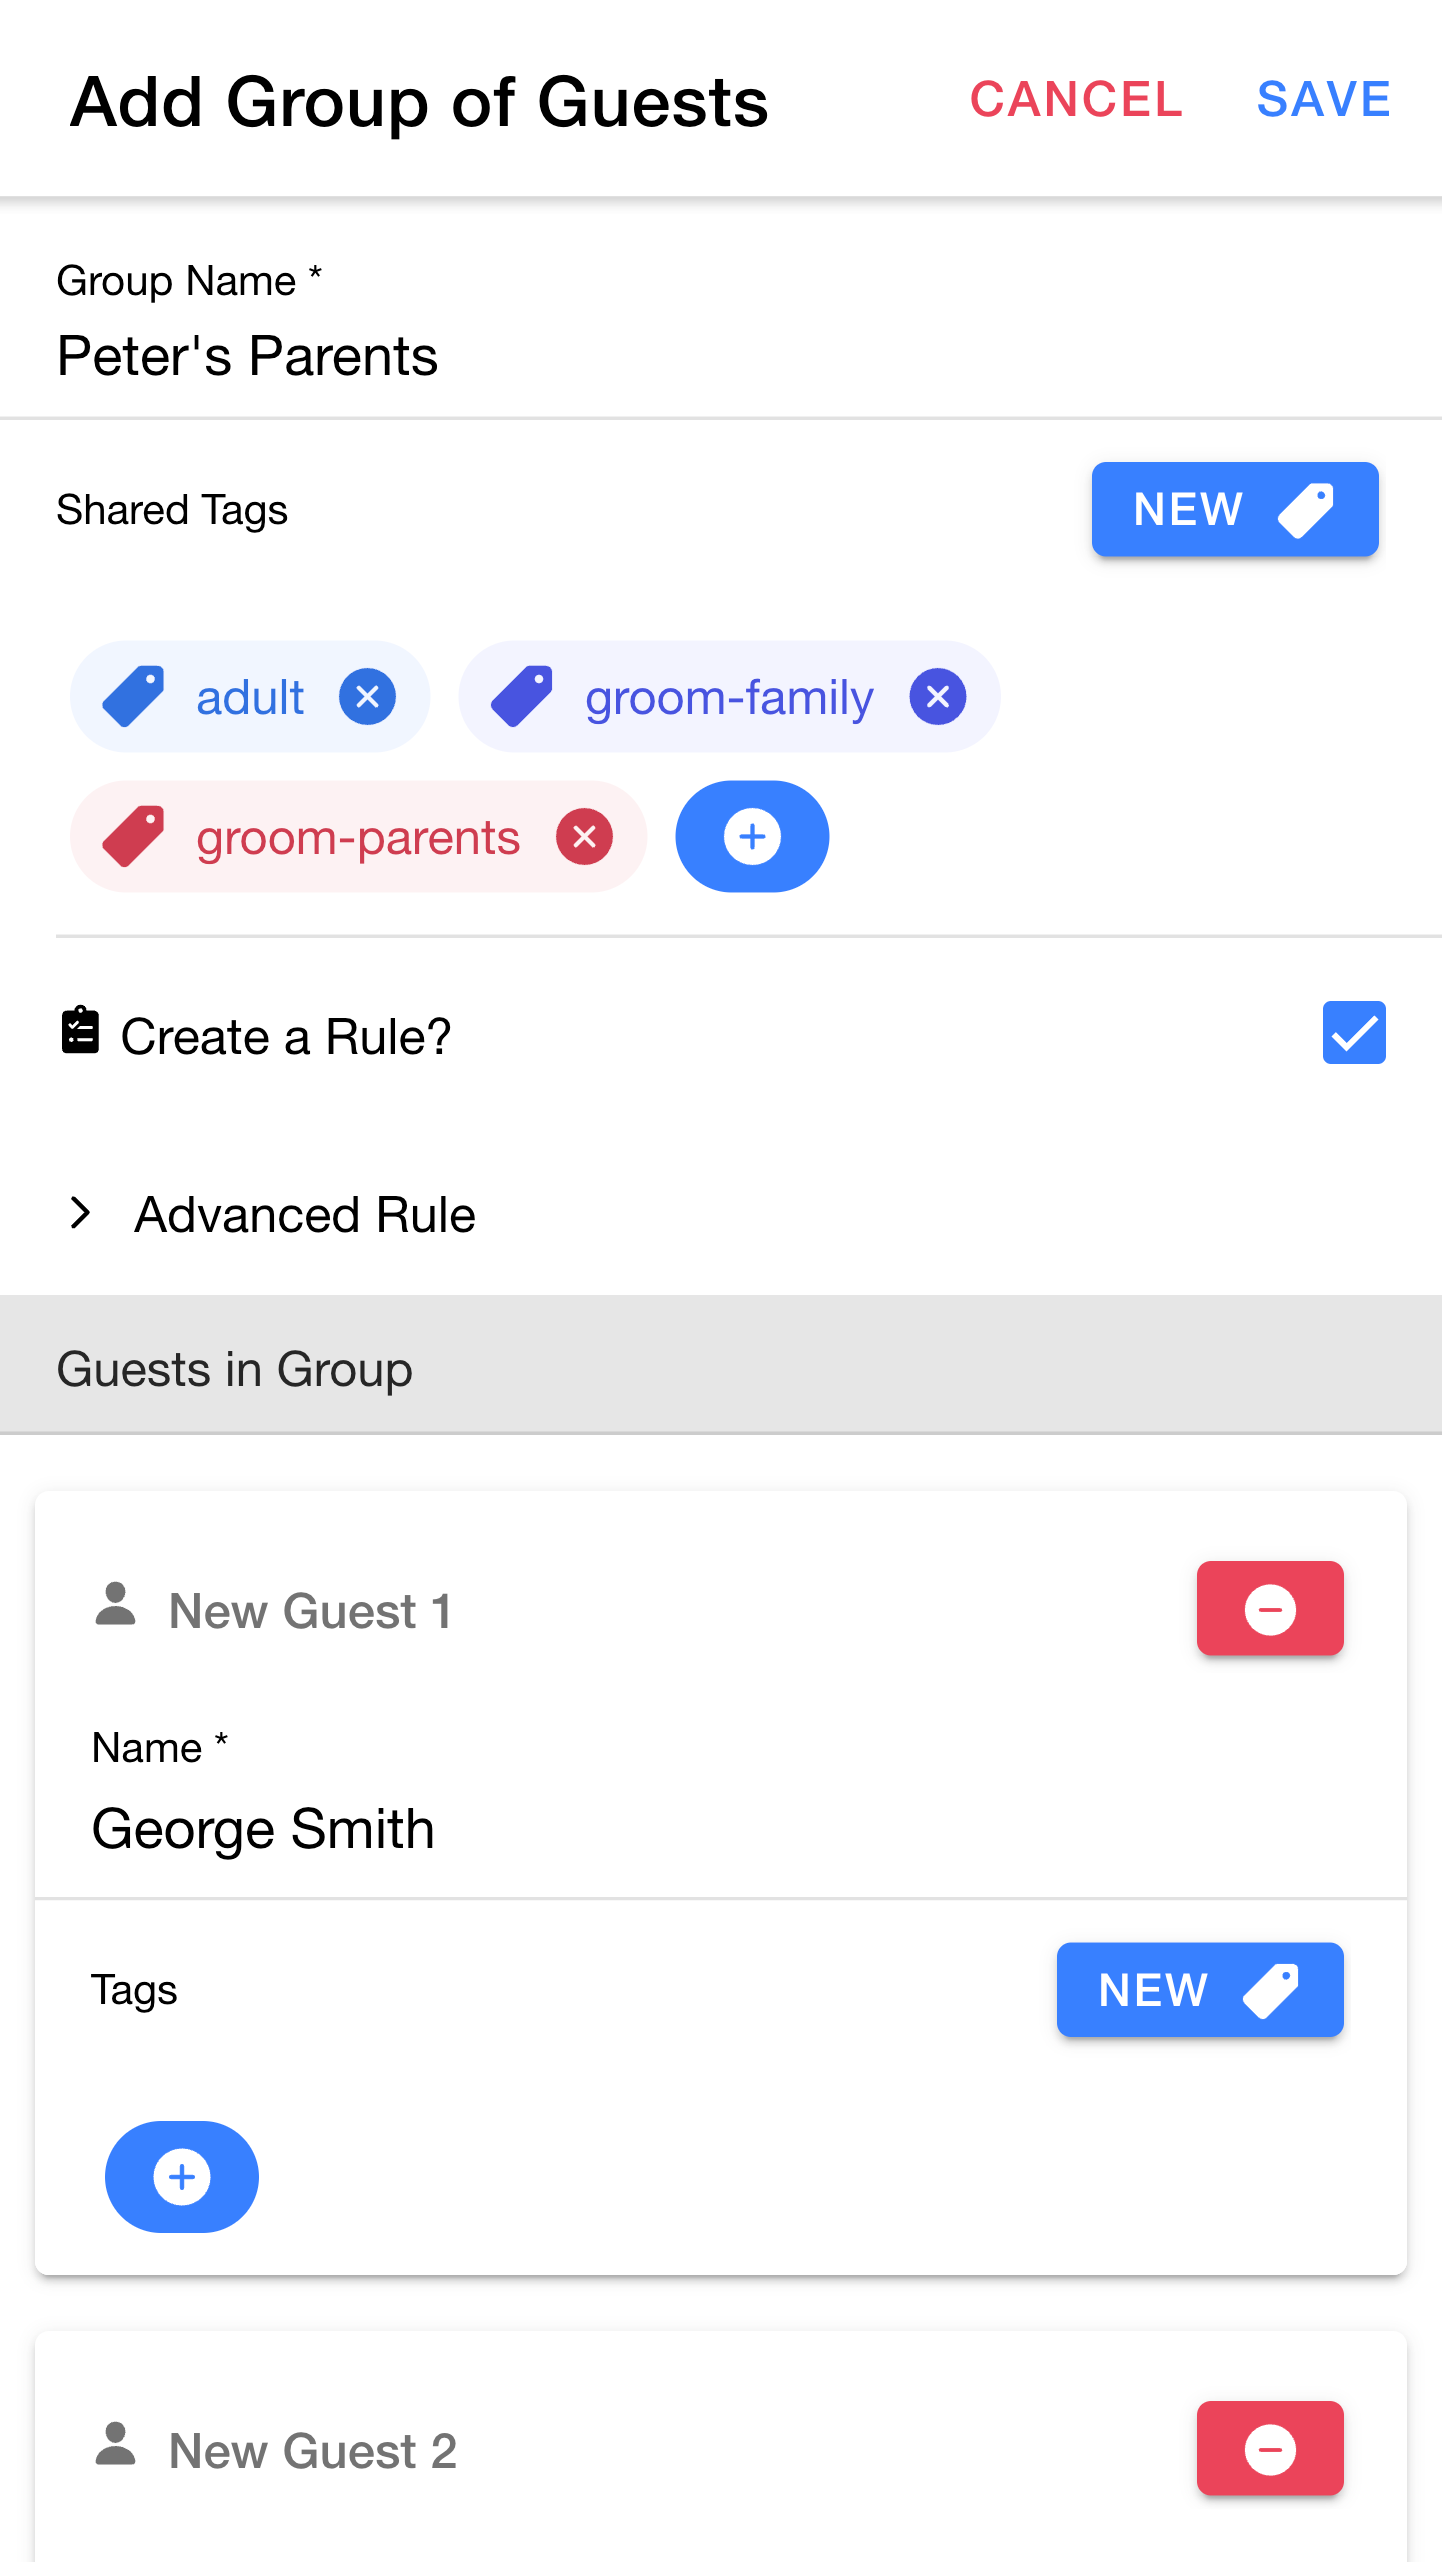
Let's repeat the same process to invite Peter's parents.
- Press
+ to select the existingadult tag - Press
NEW to create a new tag namedgroom-family - Press
NEW to create a new tag namedgroom-parents
The reasons for assigning these particular tags should become clearer later on, but if you're curious:
adult will help us to count all adult guestsgroom-family will provide a handy way to quickly filter the guest list to all of Peter's family membersgroom-parents can be used in a rule to ensure that Peter sits with his parents
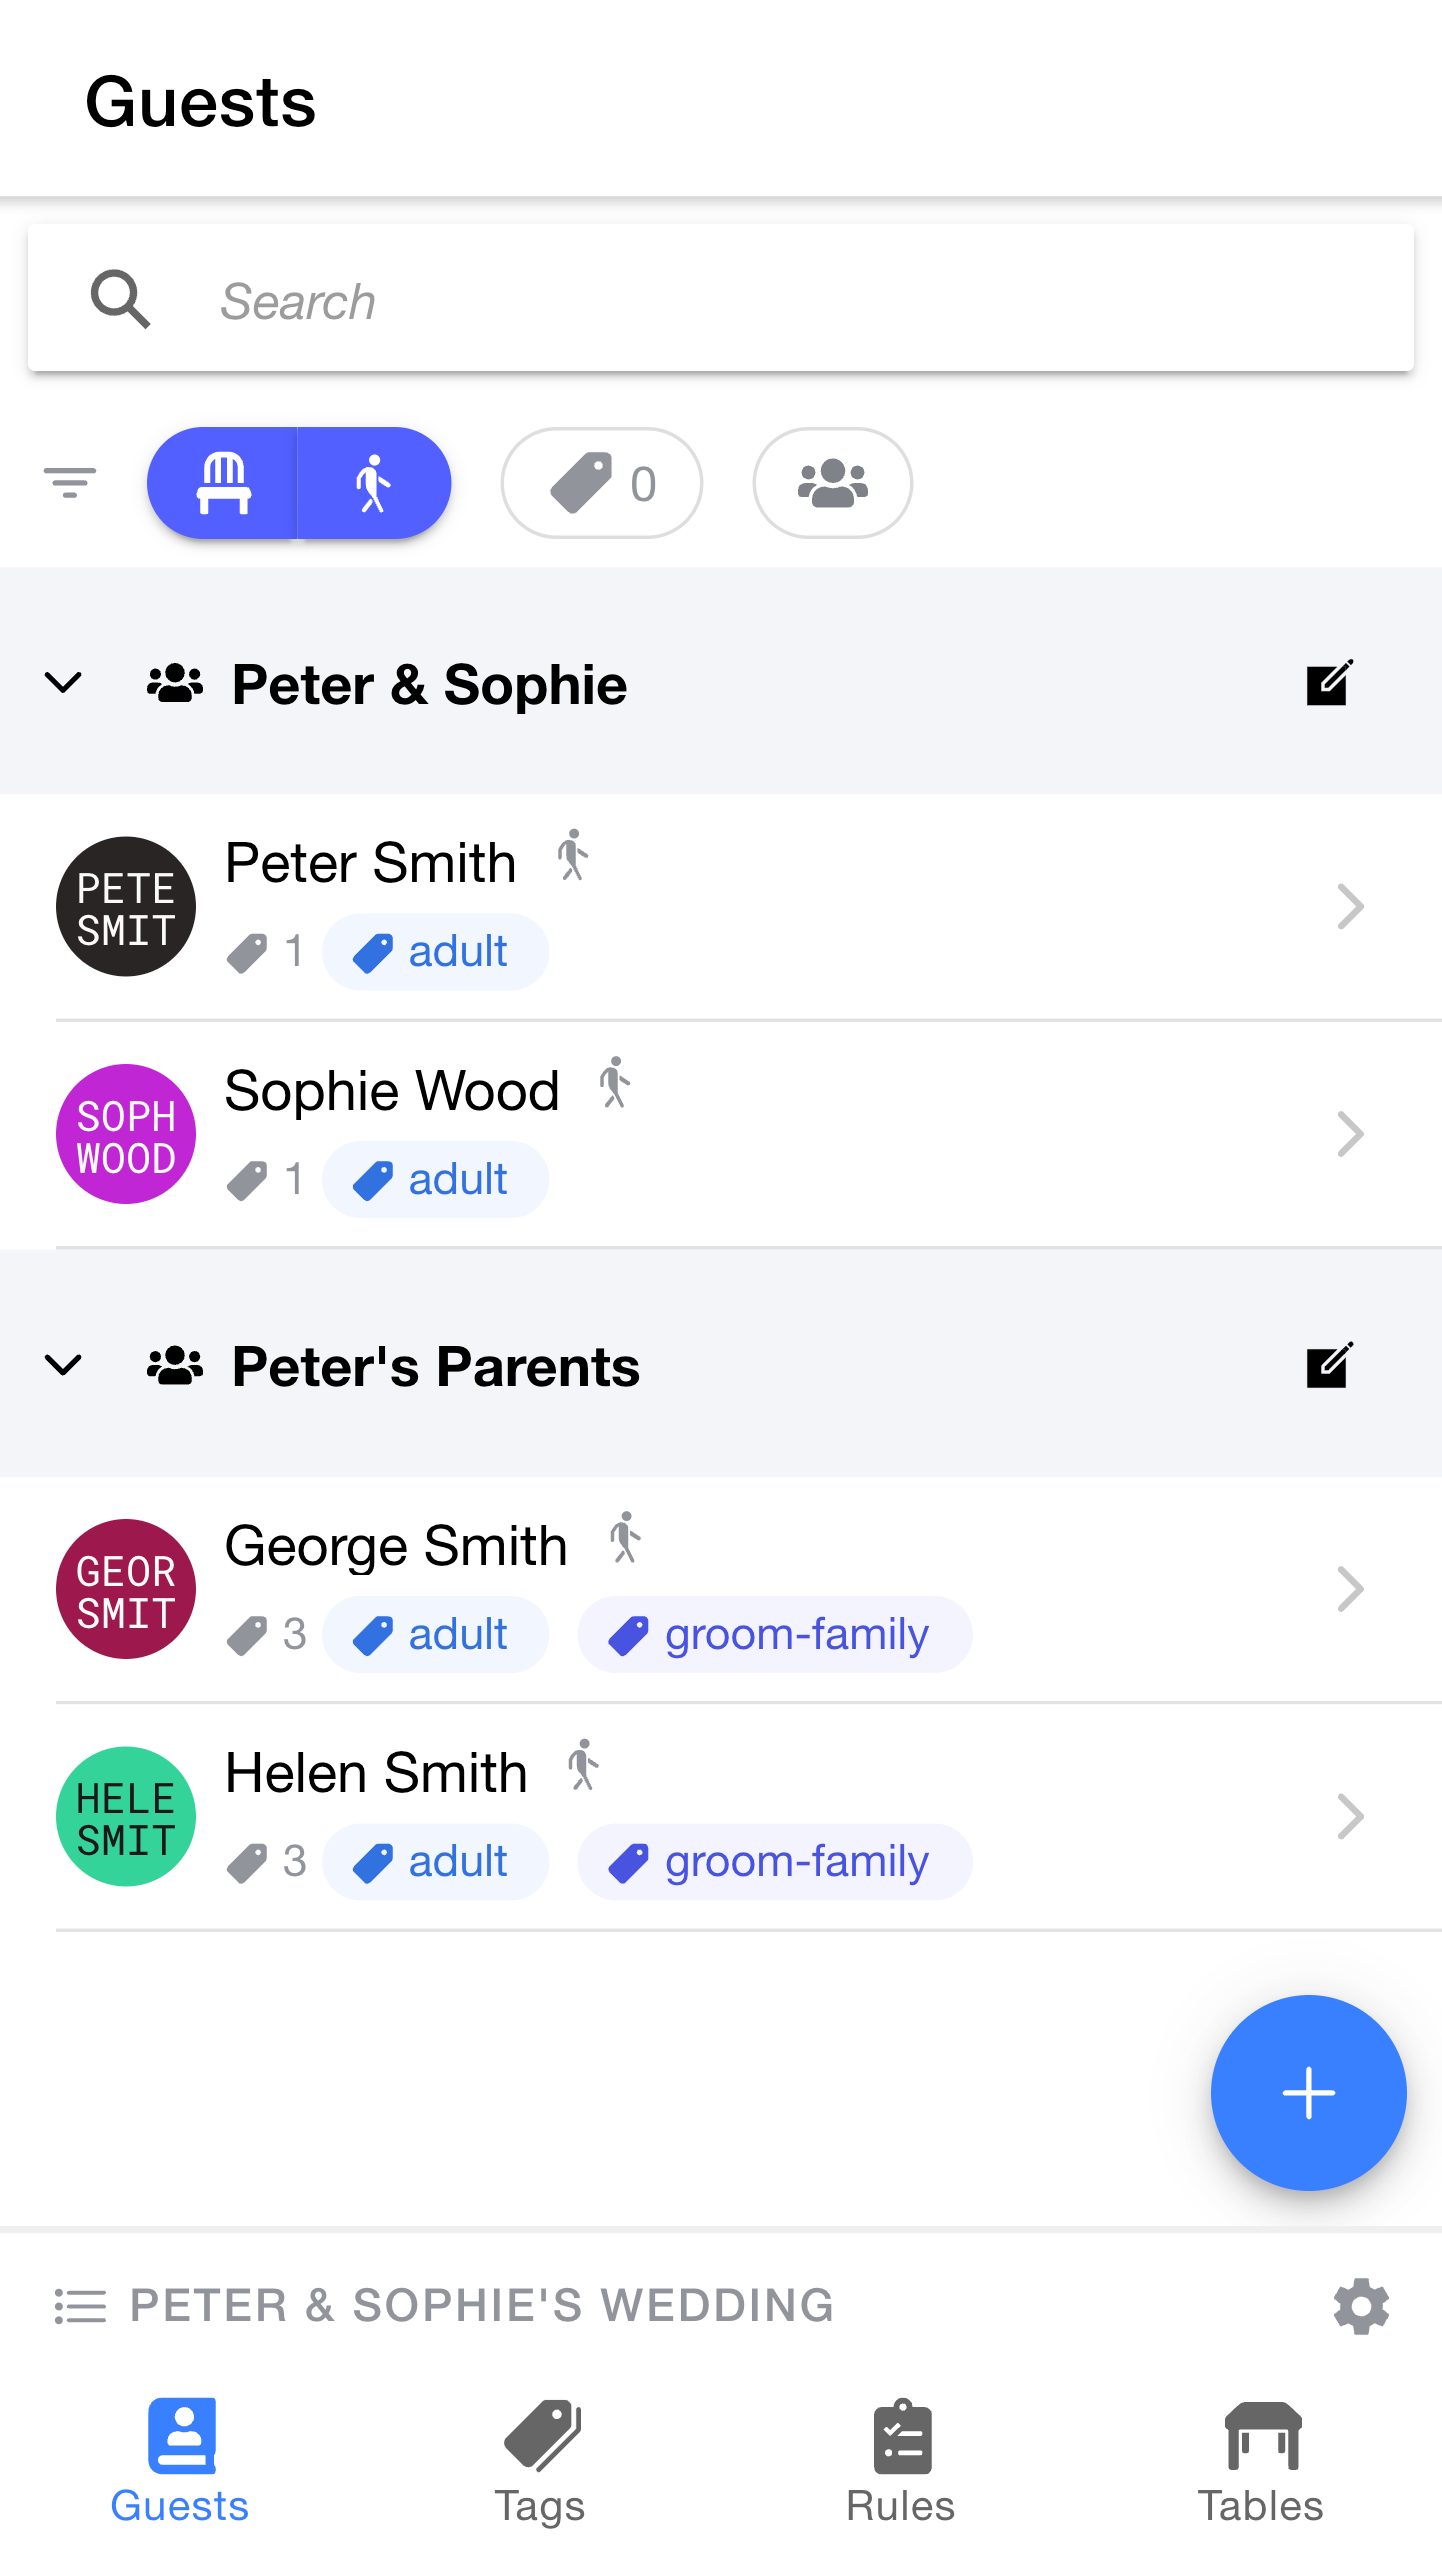
The new group should now show up in the guest list.
Next we'll add Sophie's parents, Mark and Deborah.
The process will be slightly different this time - Sophie's parents are divorced, so we won't put them in a group together.
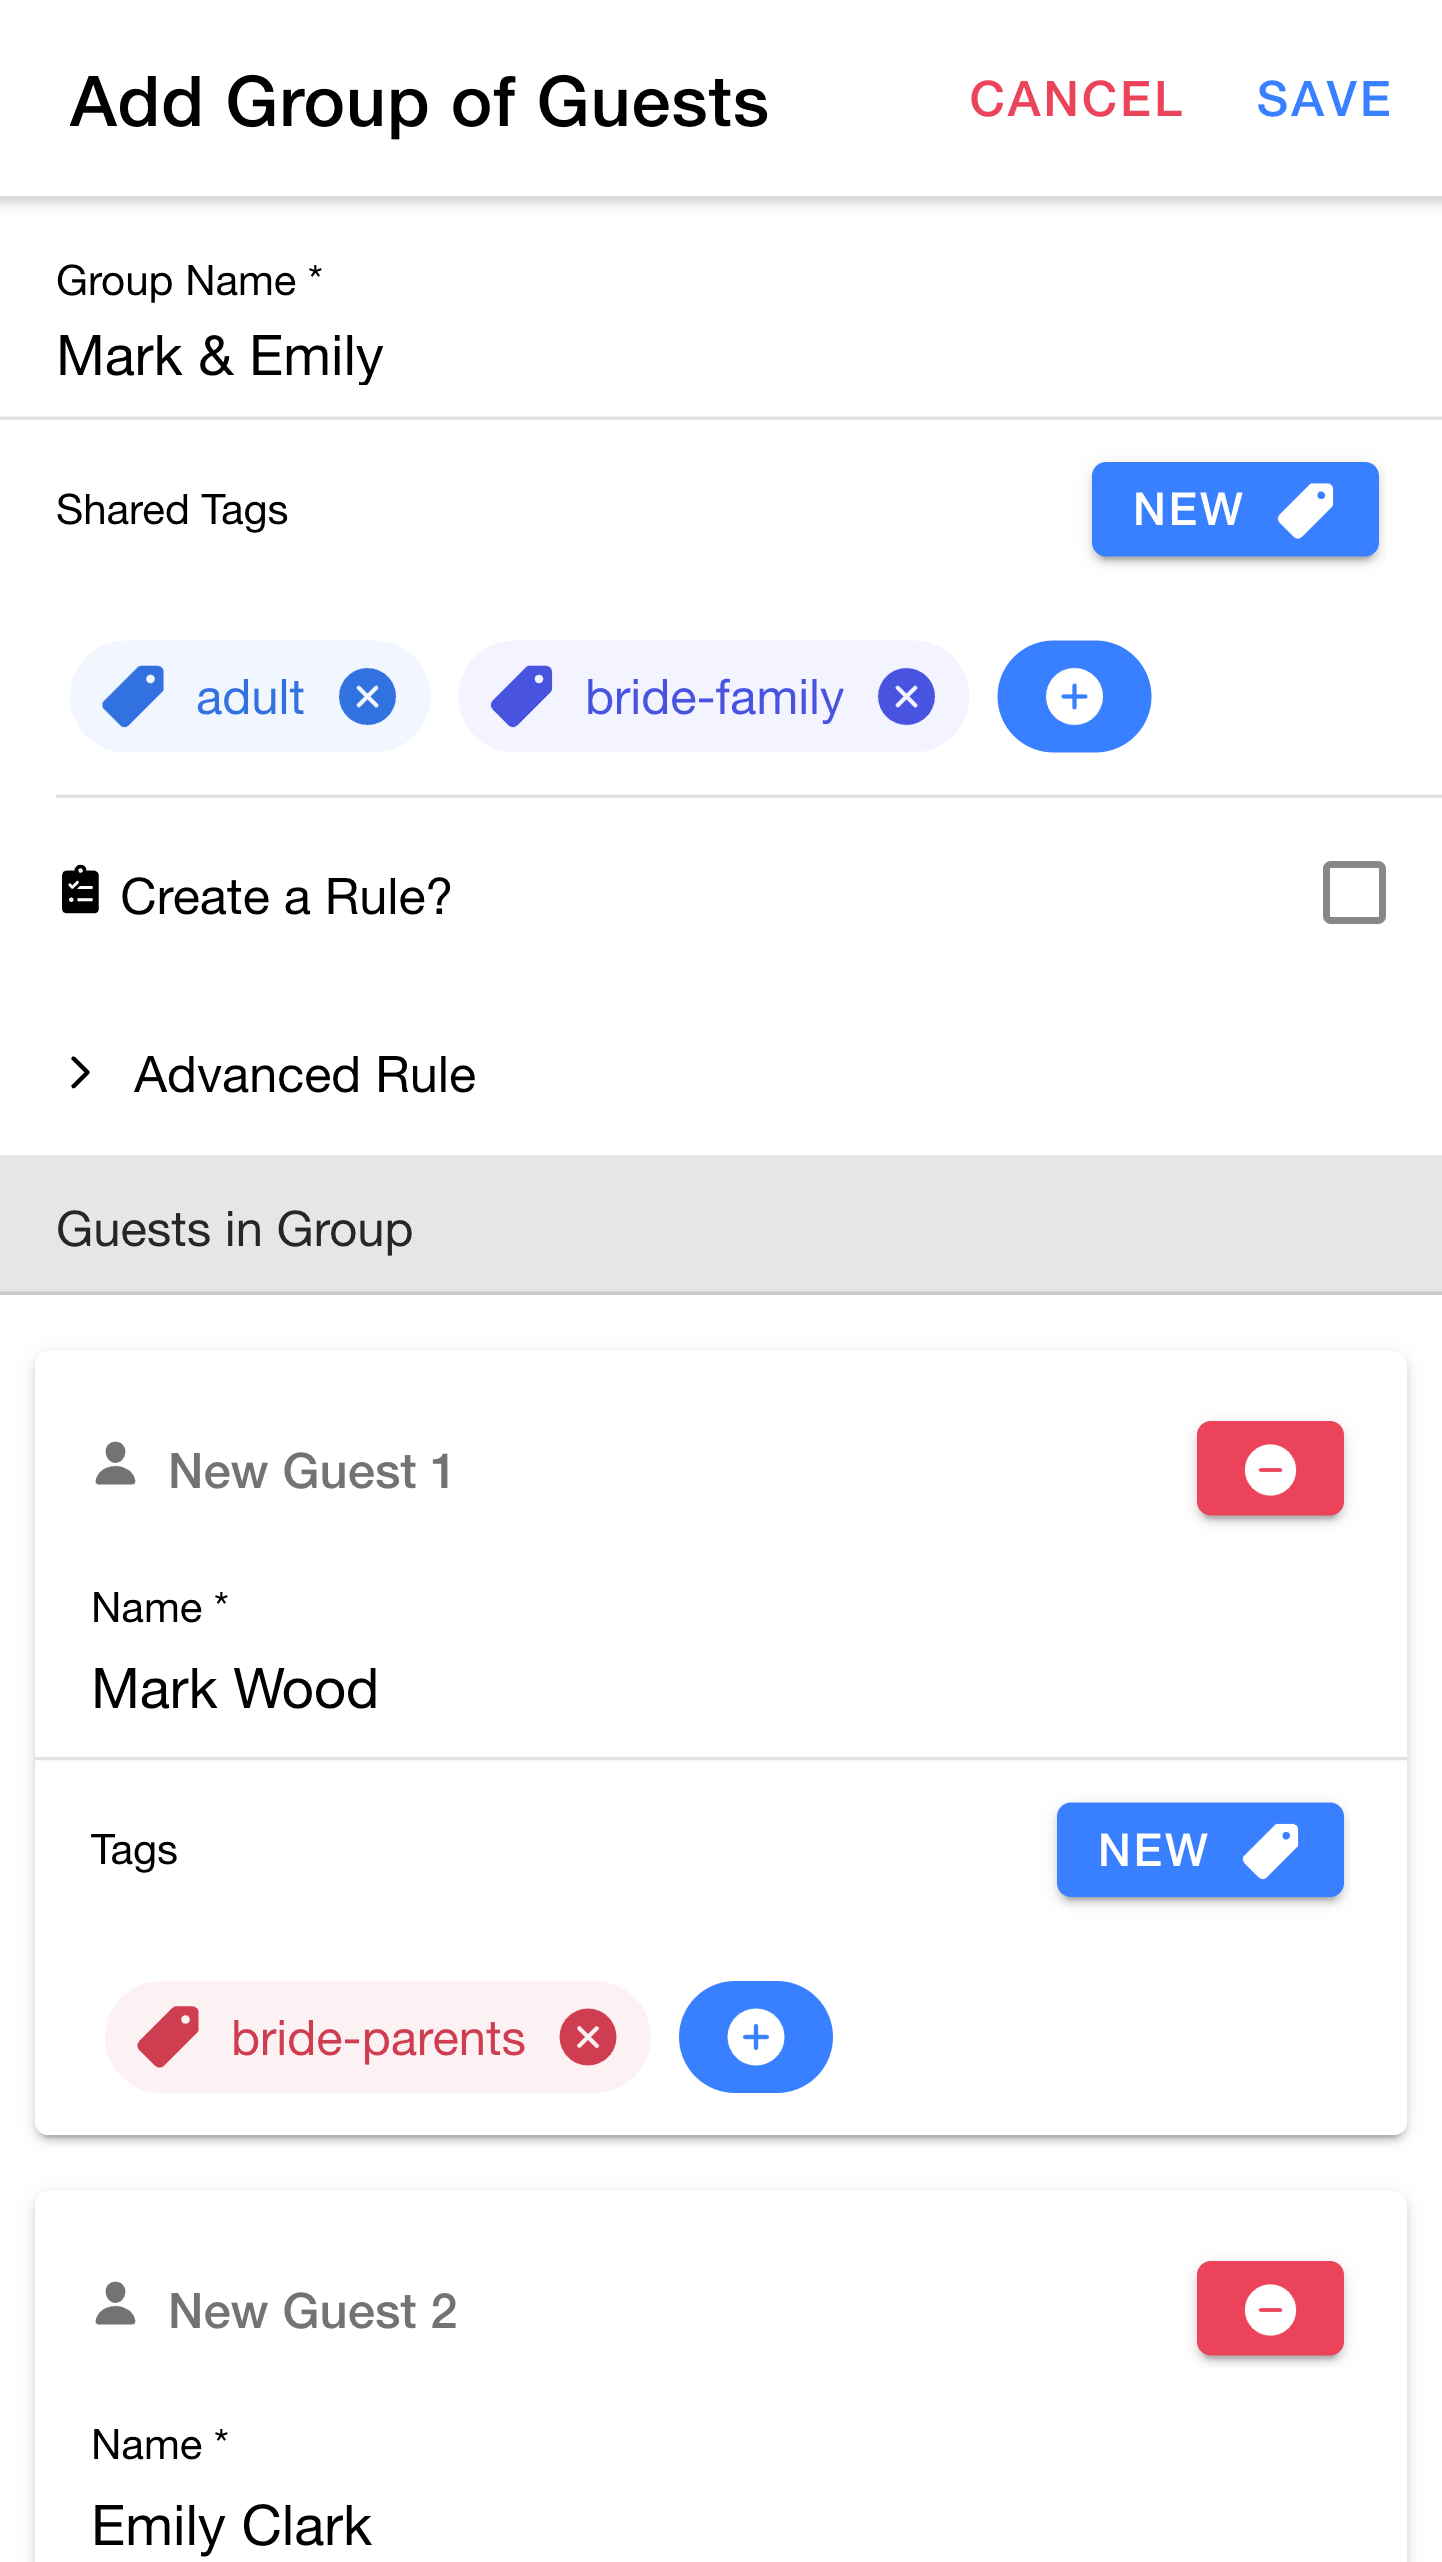
First we'll create a group to invite Mark (Sophie's father) and his partner.
- Press
+ to select the existingadult tag - Press
NEW to create a new tag namedbride-family
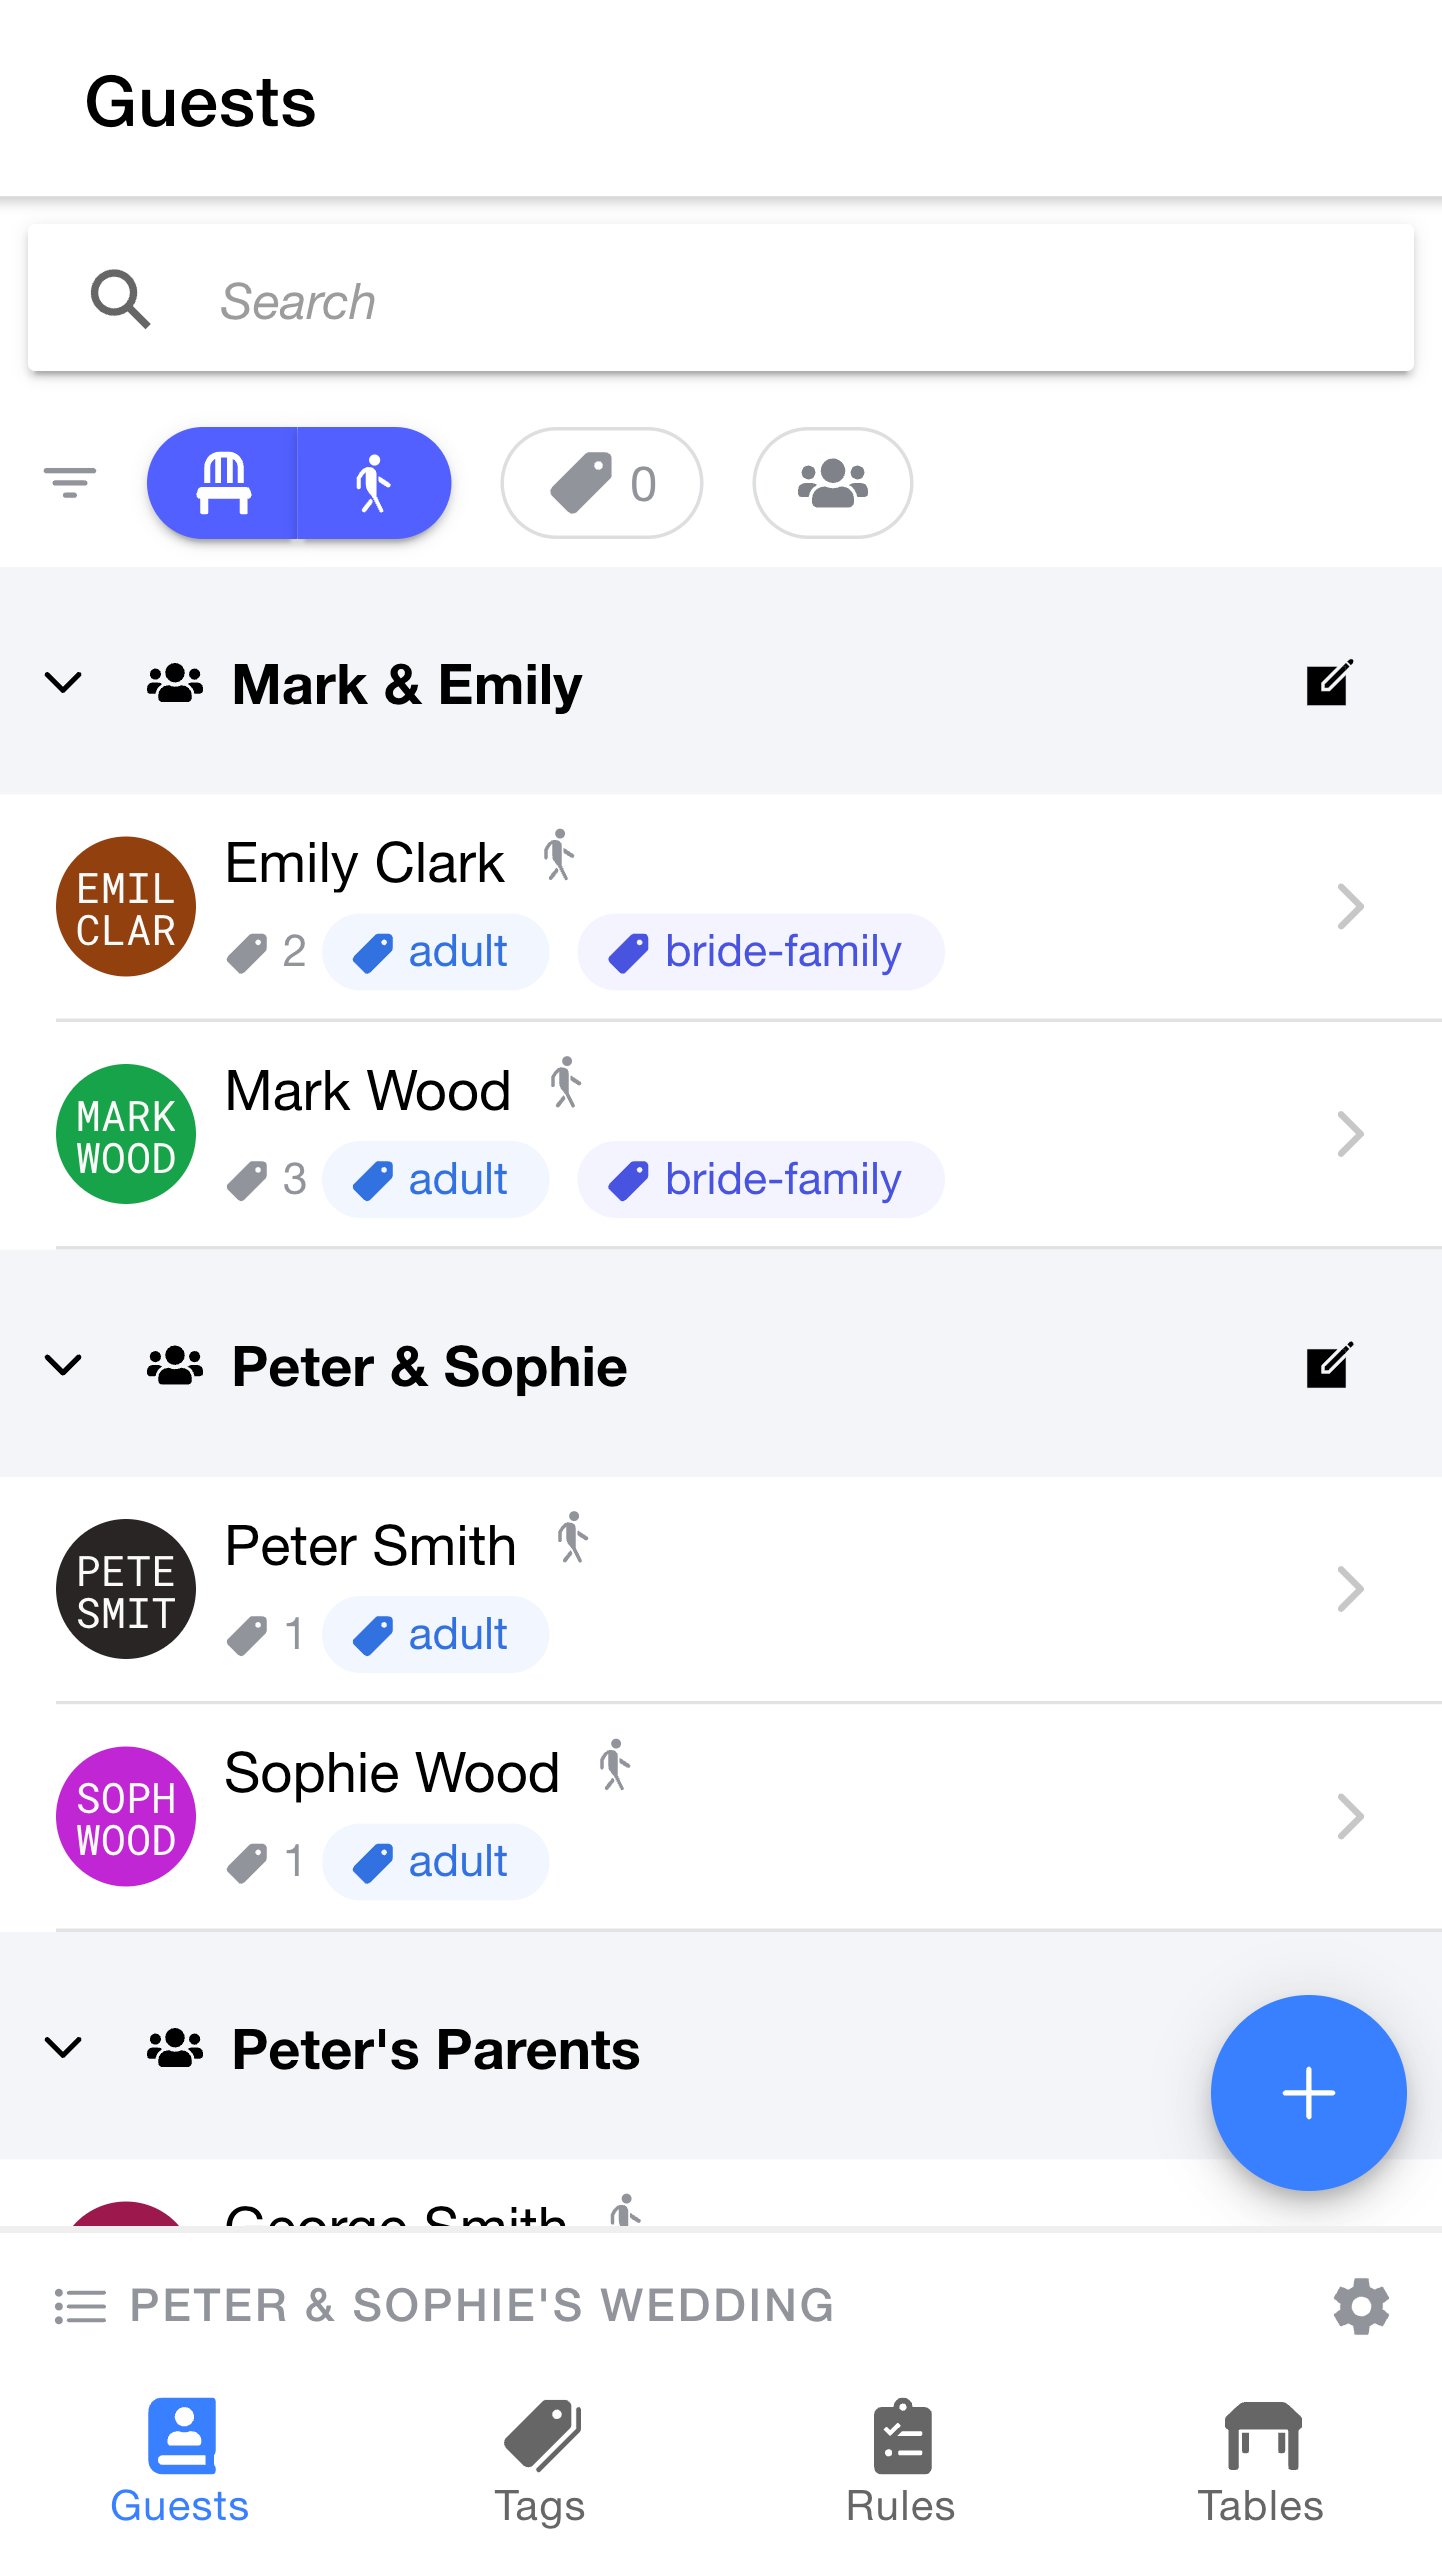
Mark & Emily now show up in the guest list.
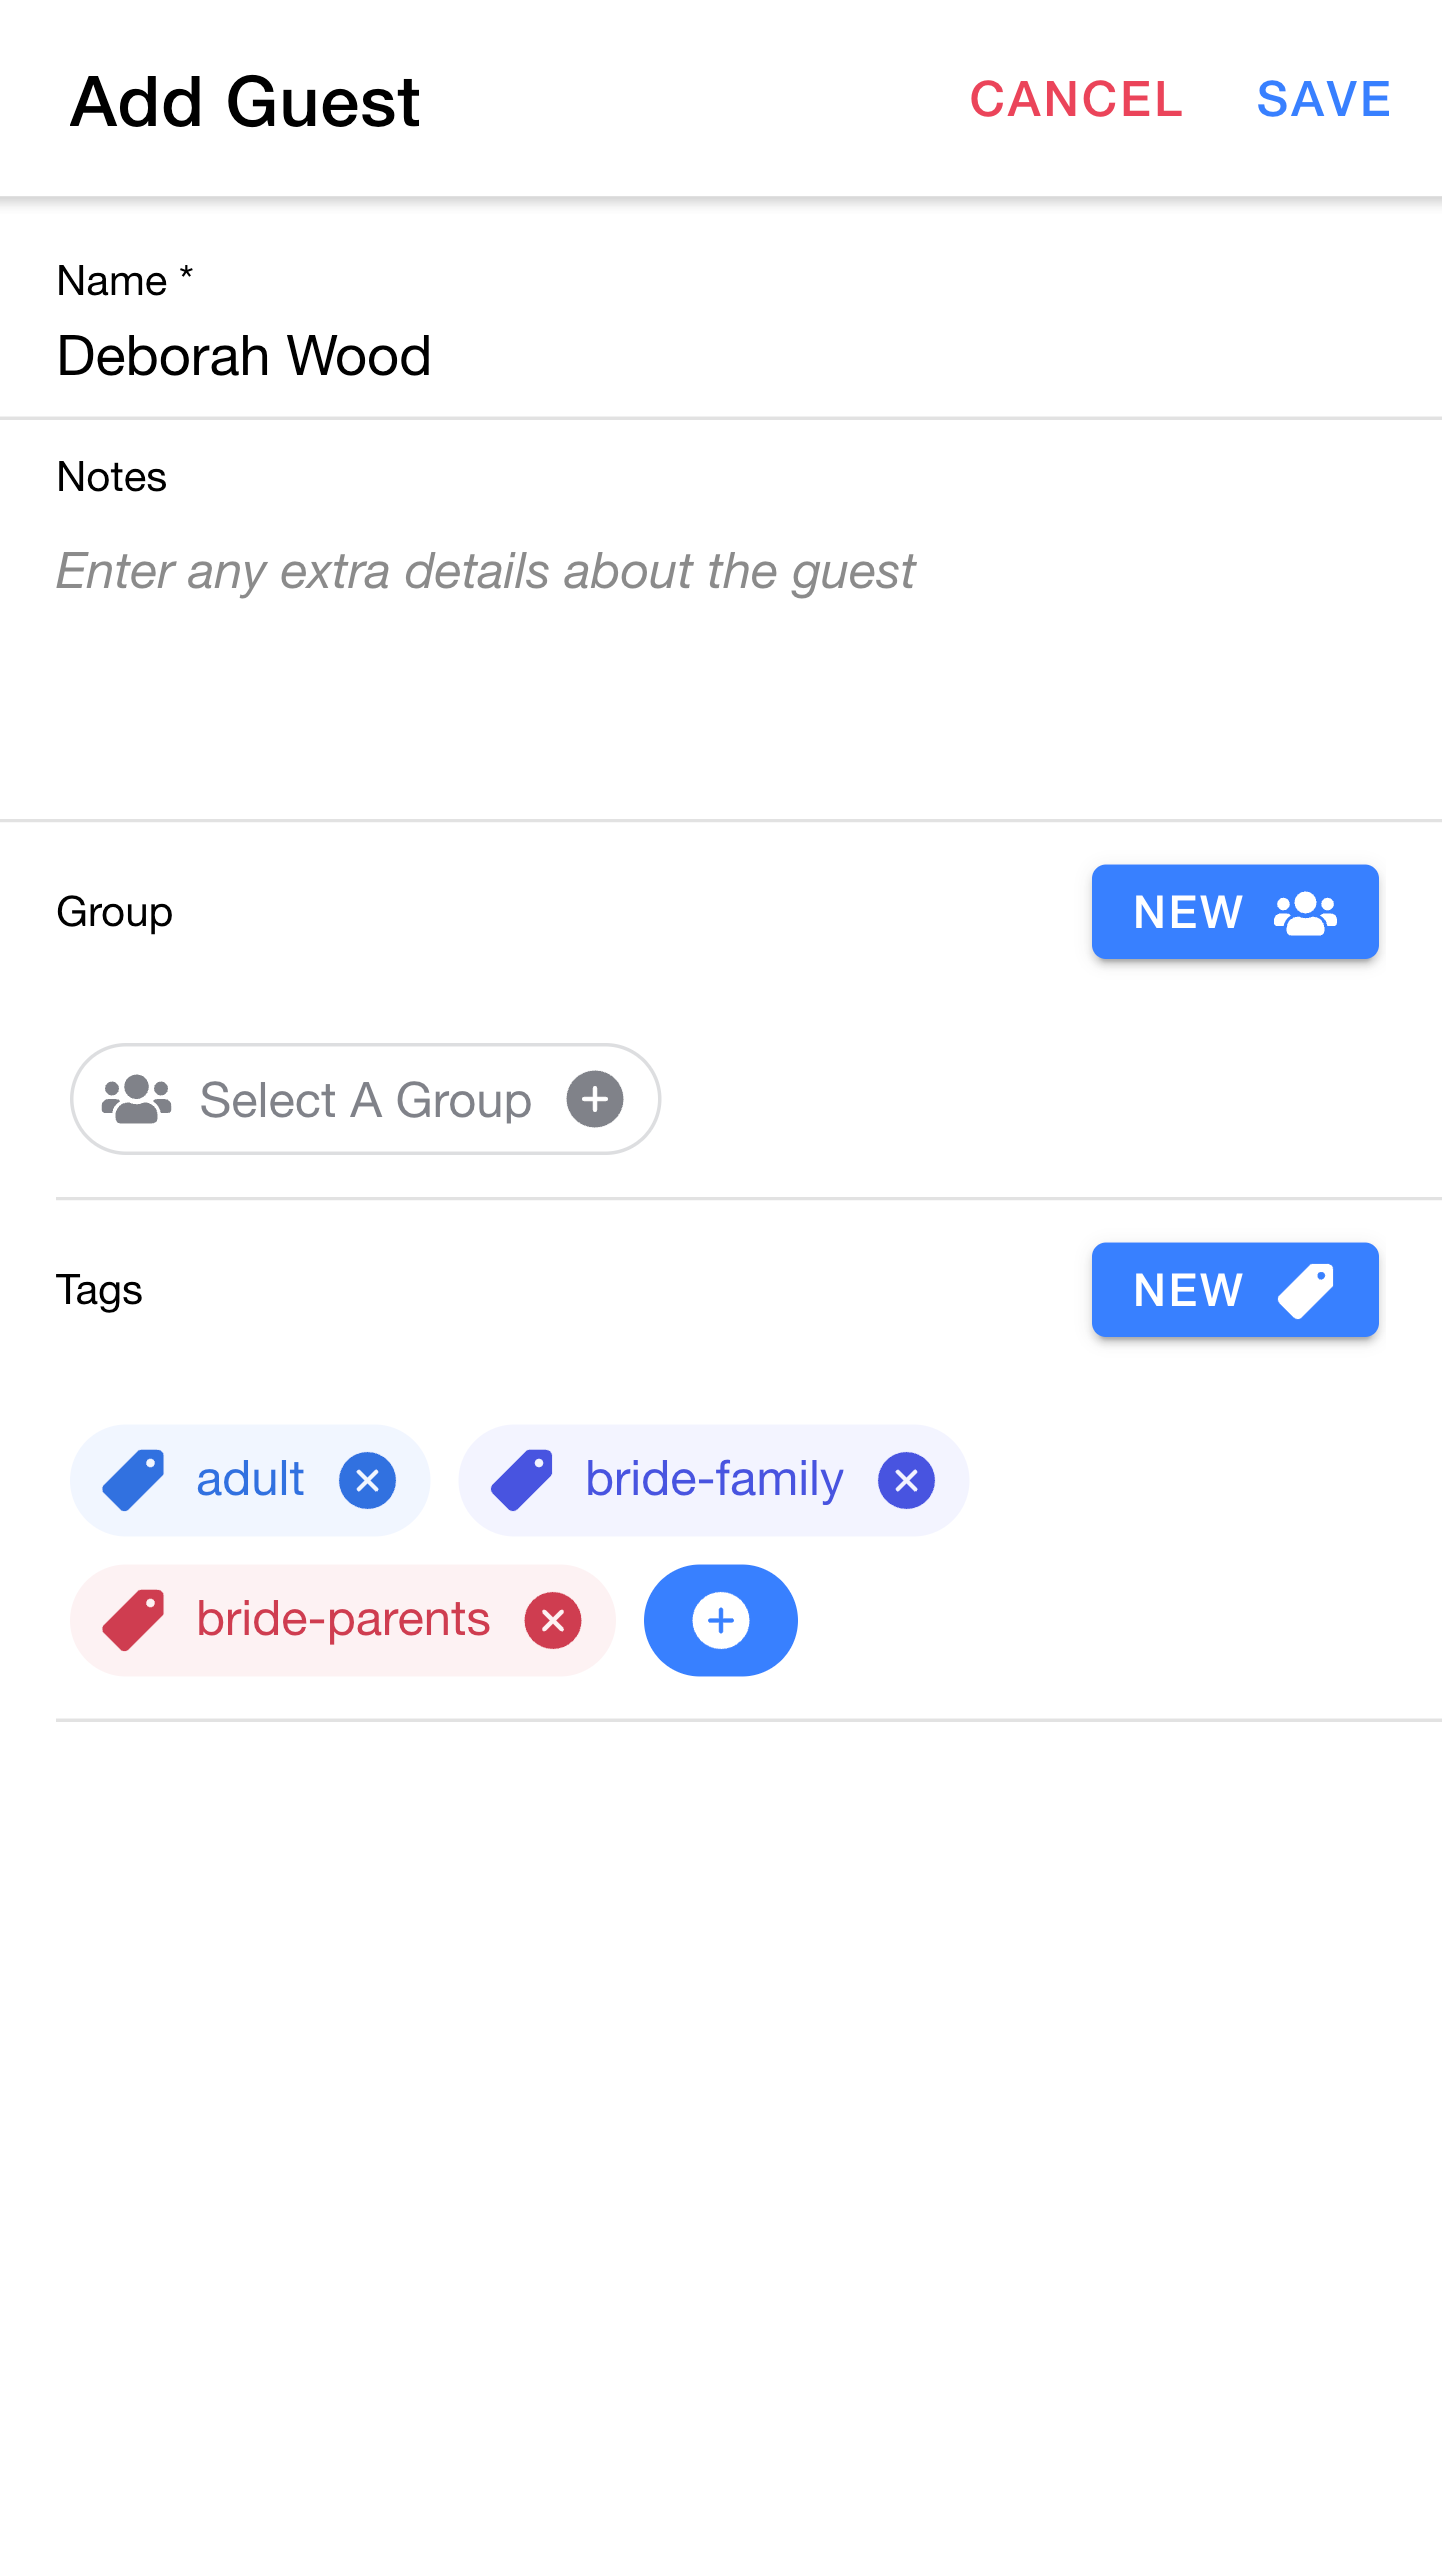
Next we'll add Sophie's mother Deborah. She's not part of a group, so we'll add her slightly differently.
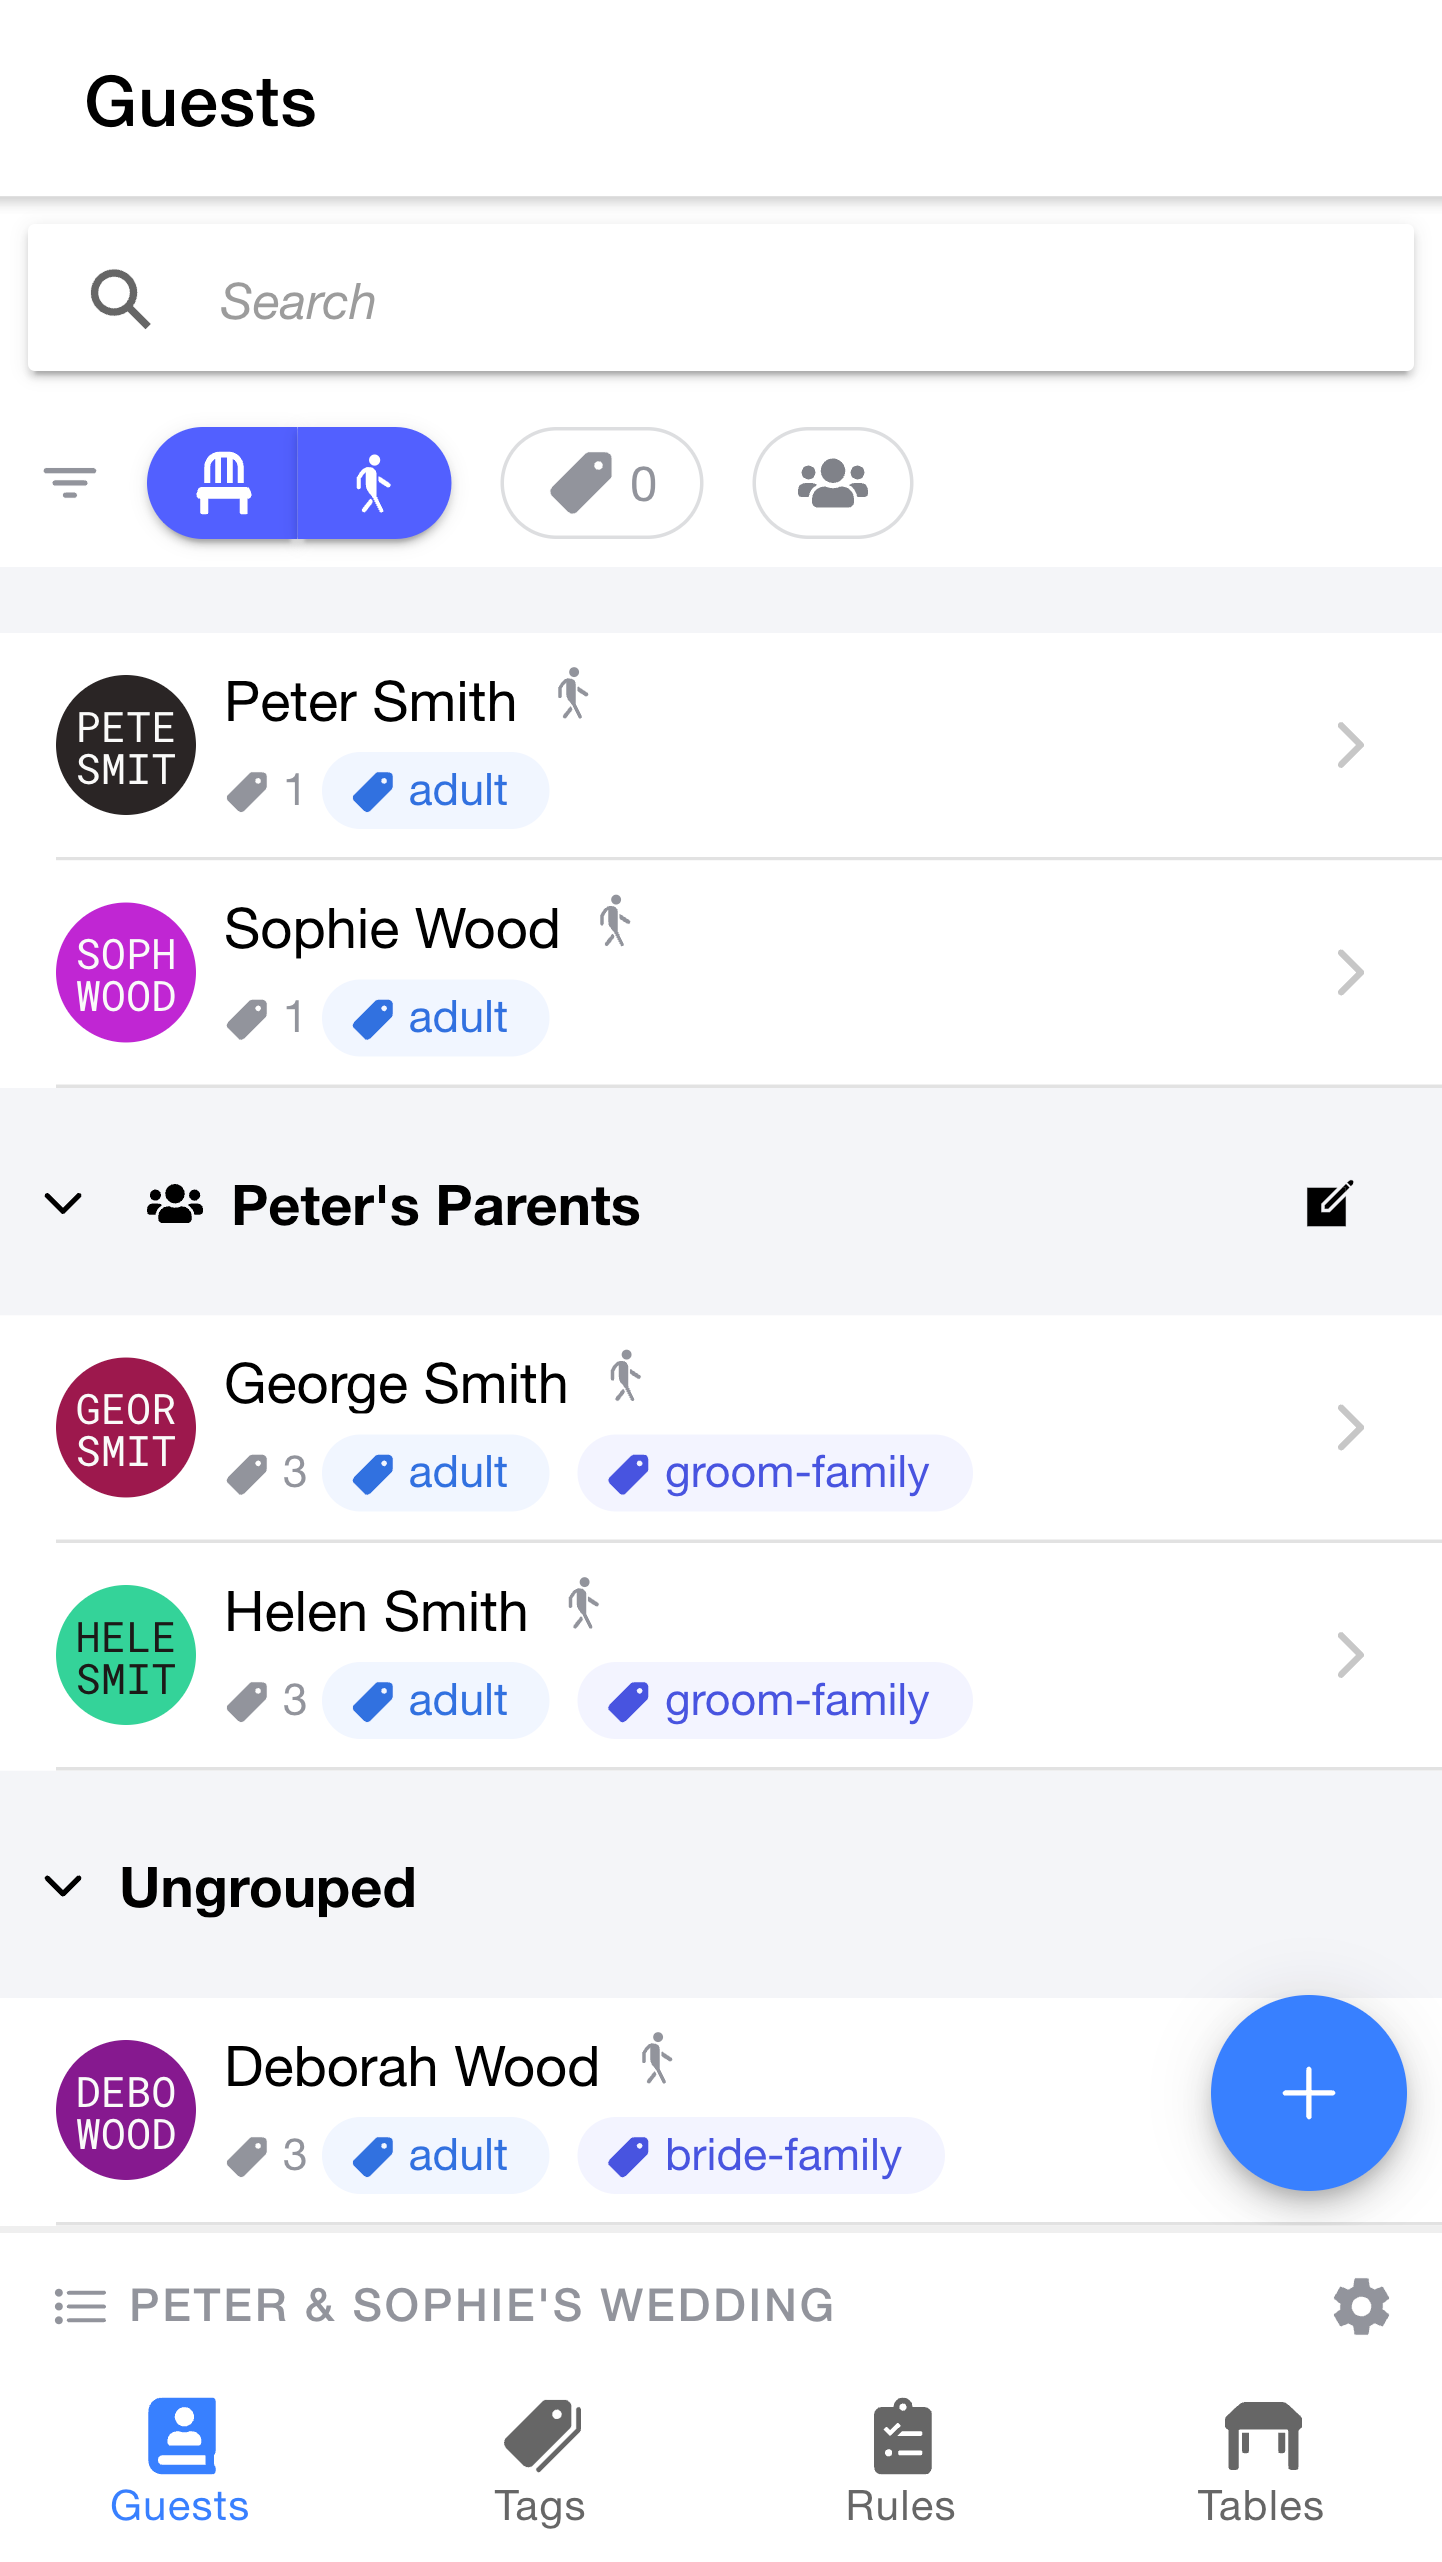
Deborah is now in the guest list.
Since Deborah is not part of a group, she'll appear in a separate section named "Ungrouped" at the bottom of the list.
That's enough guests to get us started. Feel free to invite some more guests if you like, or continue reading to see how to decide where our new guests will sit.