Plans
There's a lot to consider when designing a seating plan. As we've seen, Table Tailor helps you to evaluate how happy each of your guests are with their seating position.
Even so, it is often worth trying out a few different arrangements to see what works best.
Table Tailor has a feature called
Plans allow you to compare and contrast different options, with each plan holding a separate set of:
- Table information (number of tables, table names, table shapes / sizes)
- Seating information (who is sat where)
At the top of the
This is where you can manage your plans for the currently active event.
You can see your currently selected plan or switch between them using the dropdown. At the moment, we are working with
To the right of the dropdown are buttons for managing plans.
- The
+ button can be used to create a new plan, we'll look at this in more detail shortly. - The
edit button lets you rename the active plan or add notes. - The
delete button lets you delete the plan. You must have at least one plan in each event, so this is only available if you have two or more plans.
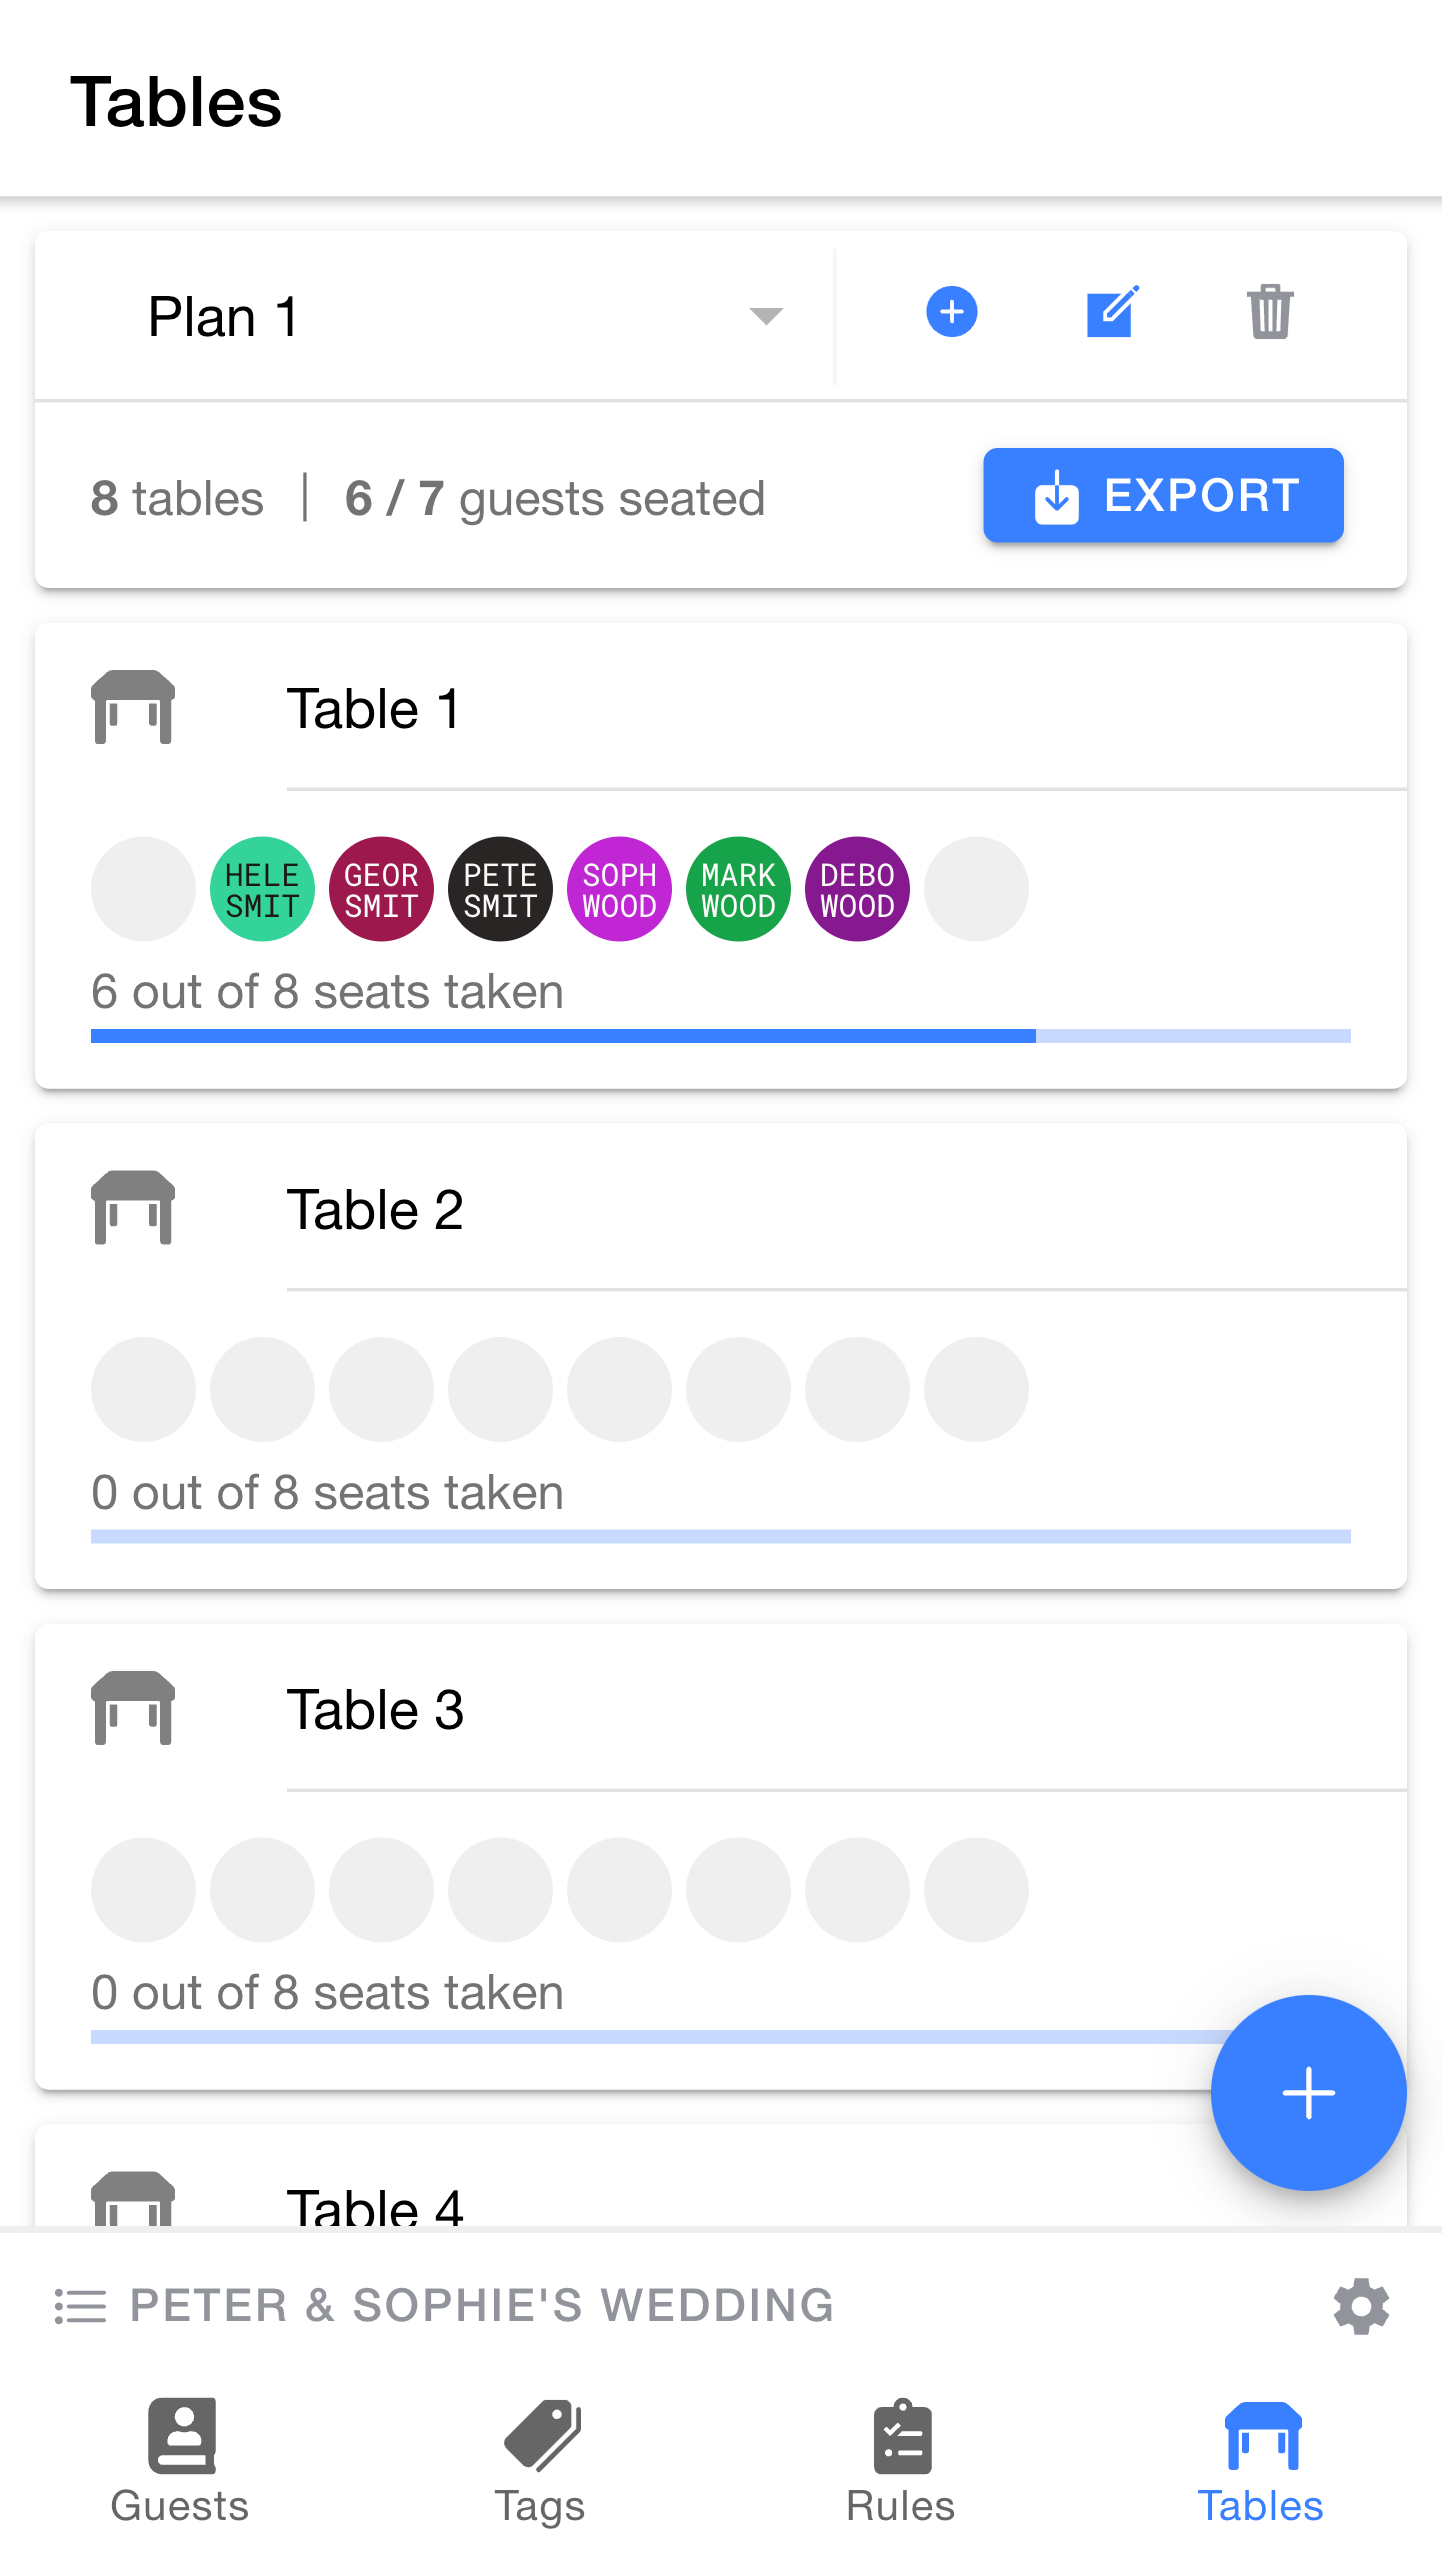
Below the plan dropdown is a summary of the active plan. As you can see, this plan has 8 tables and 7 guests, 6 of which have been seated.
There is an

Let's create a new plan so that we can try a different seating arrangement. By doing this in a second plan, we can safely experiment without losing our current layout.
Tip: This option lets you choose whether the new plan should be created as a blank canvas, or whether you'd like to copy any information from an existing plan.
Tip: This option lets you choose how much information should be copied from the existing plan. "Just the tables" will give you the same tables but with all seats unoccupied, whereas "Tables and guest positions" will create a new copy of the tables and all of your seating choices.
The
Let's make some changes, using what we learnt earlier:
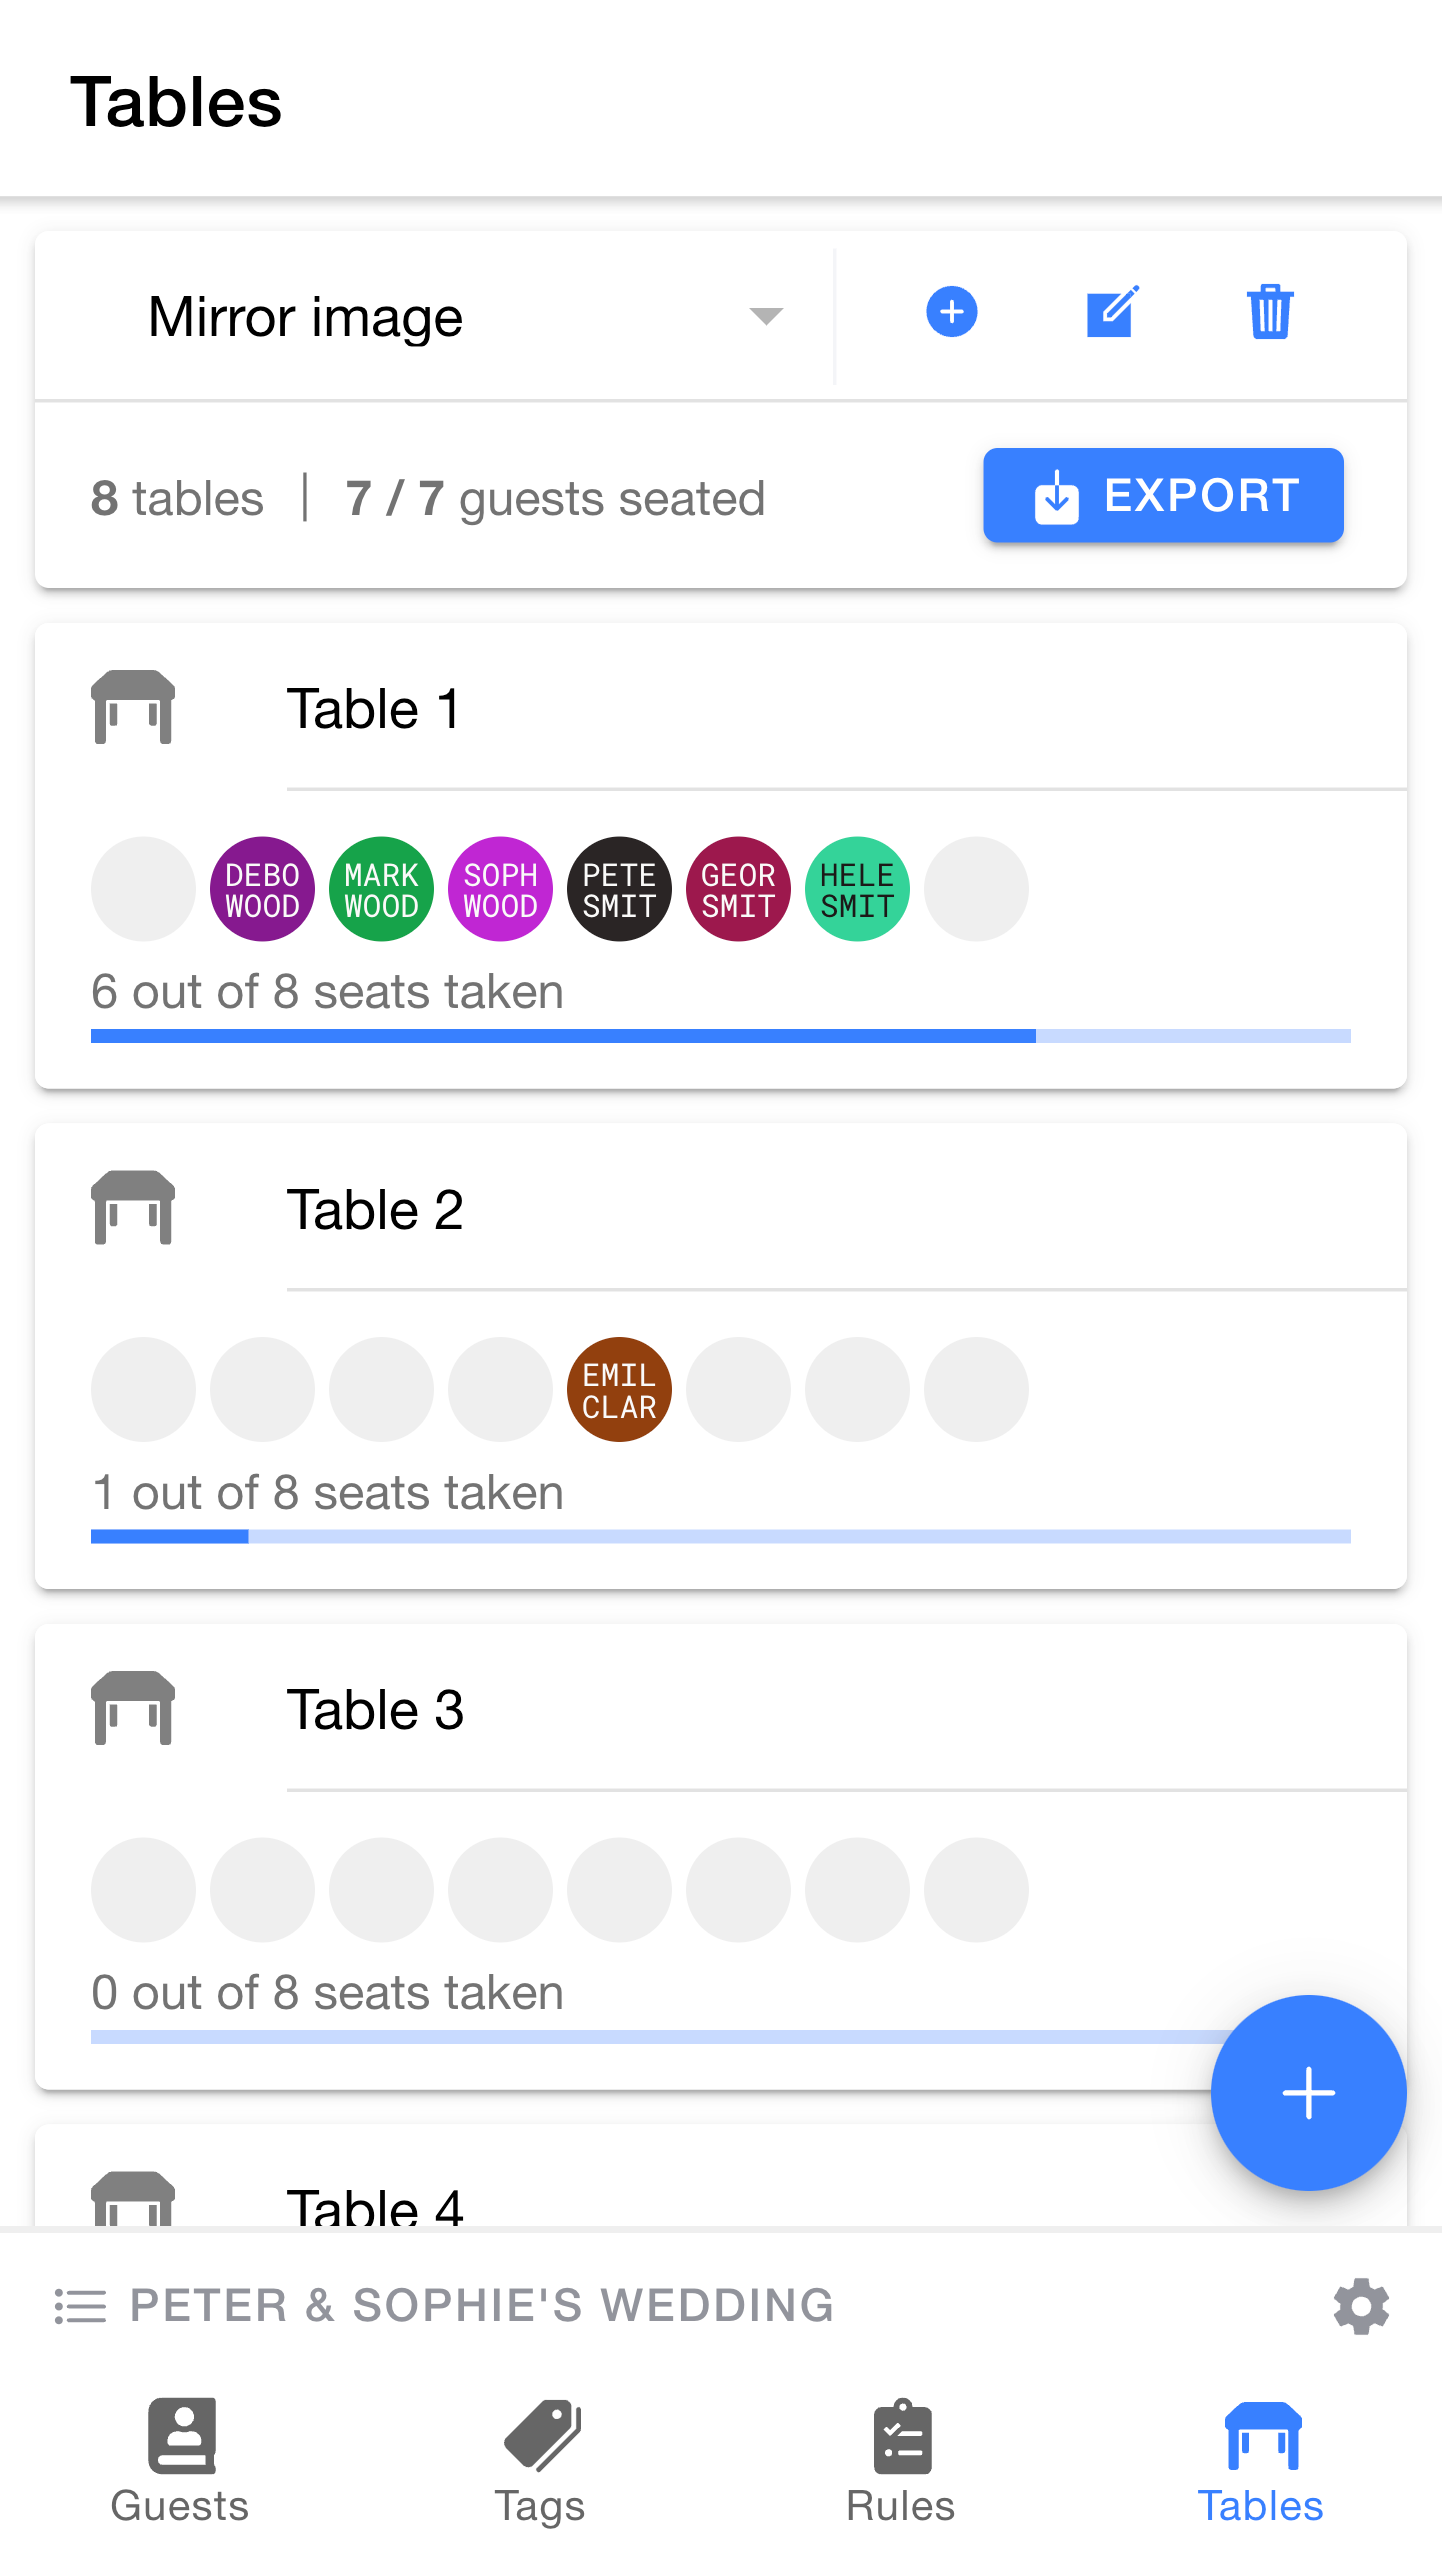
As you can see, our changes all show up in the overview.

We can switch between our plans to try different options and compare them.
By switching between multiple plans, it is easy to try out different variations without losing anything.