Goal: Create 8 circular tables, each seating 8 guests
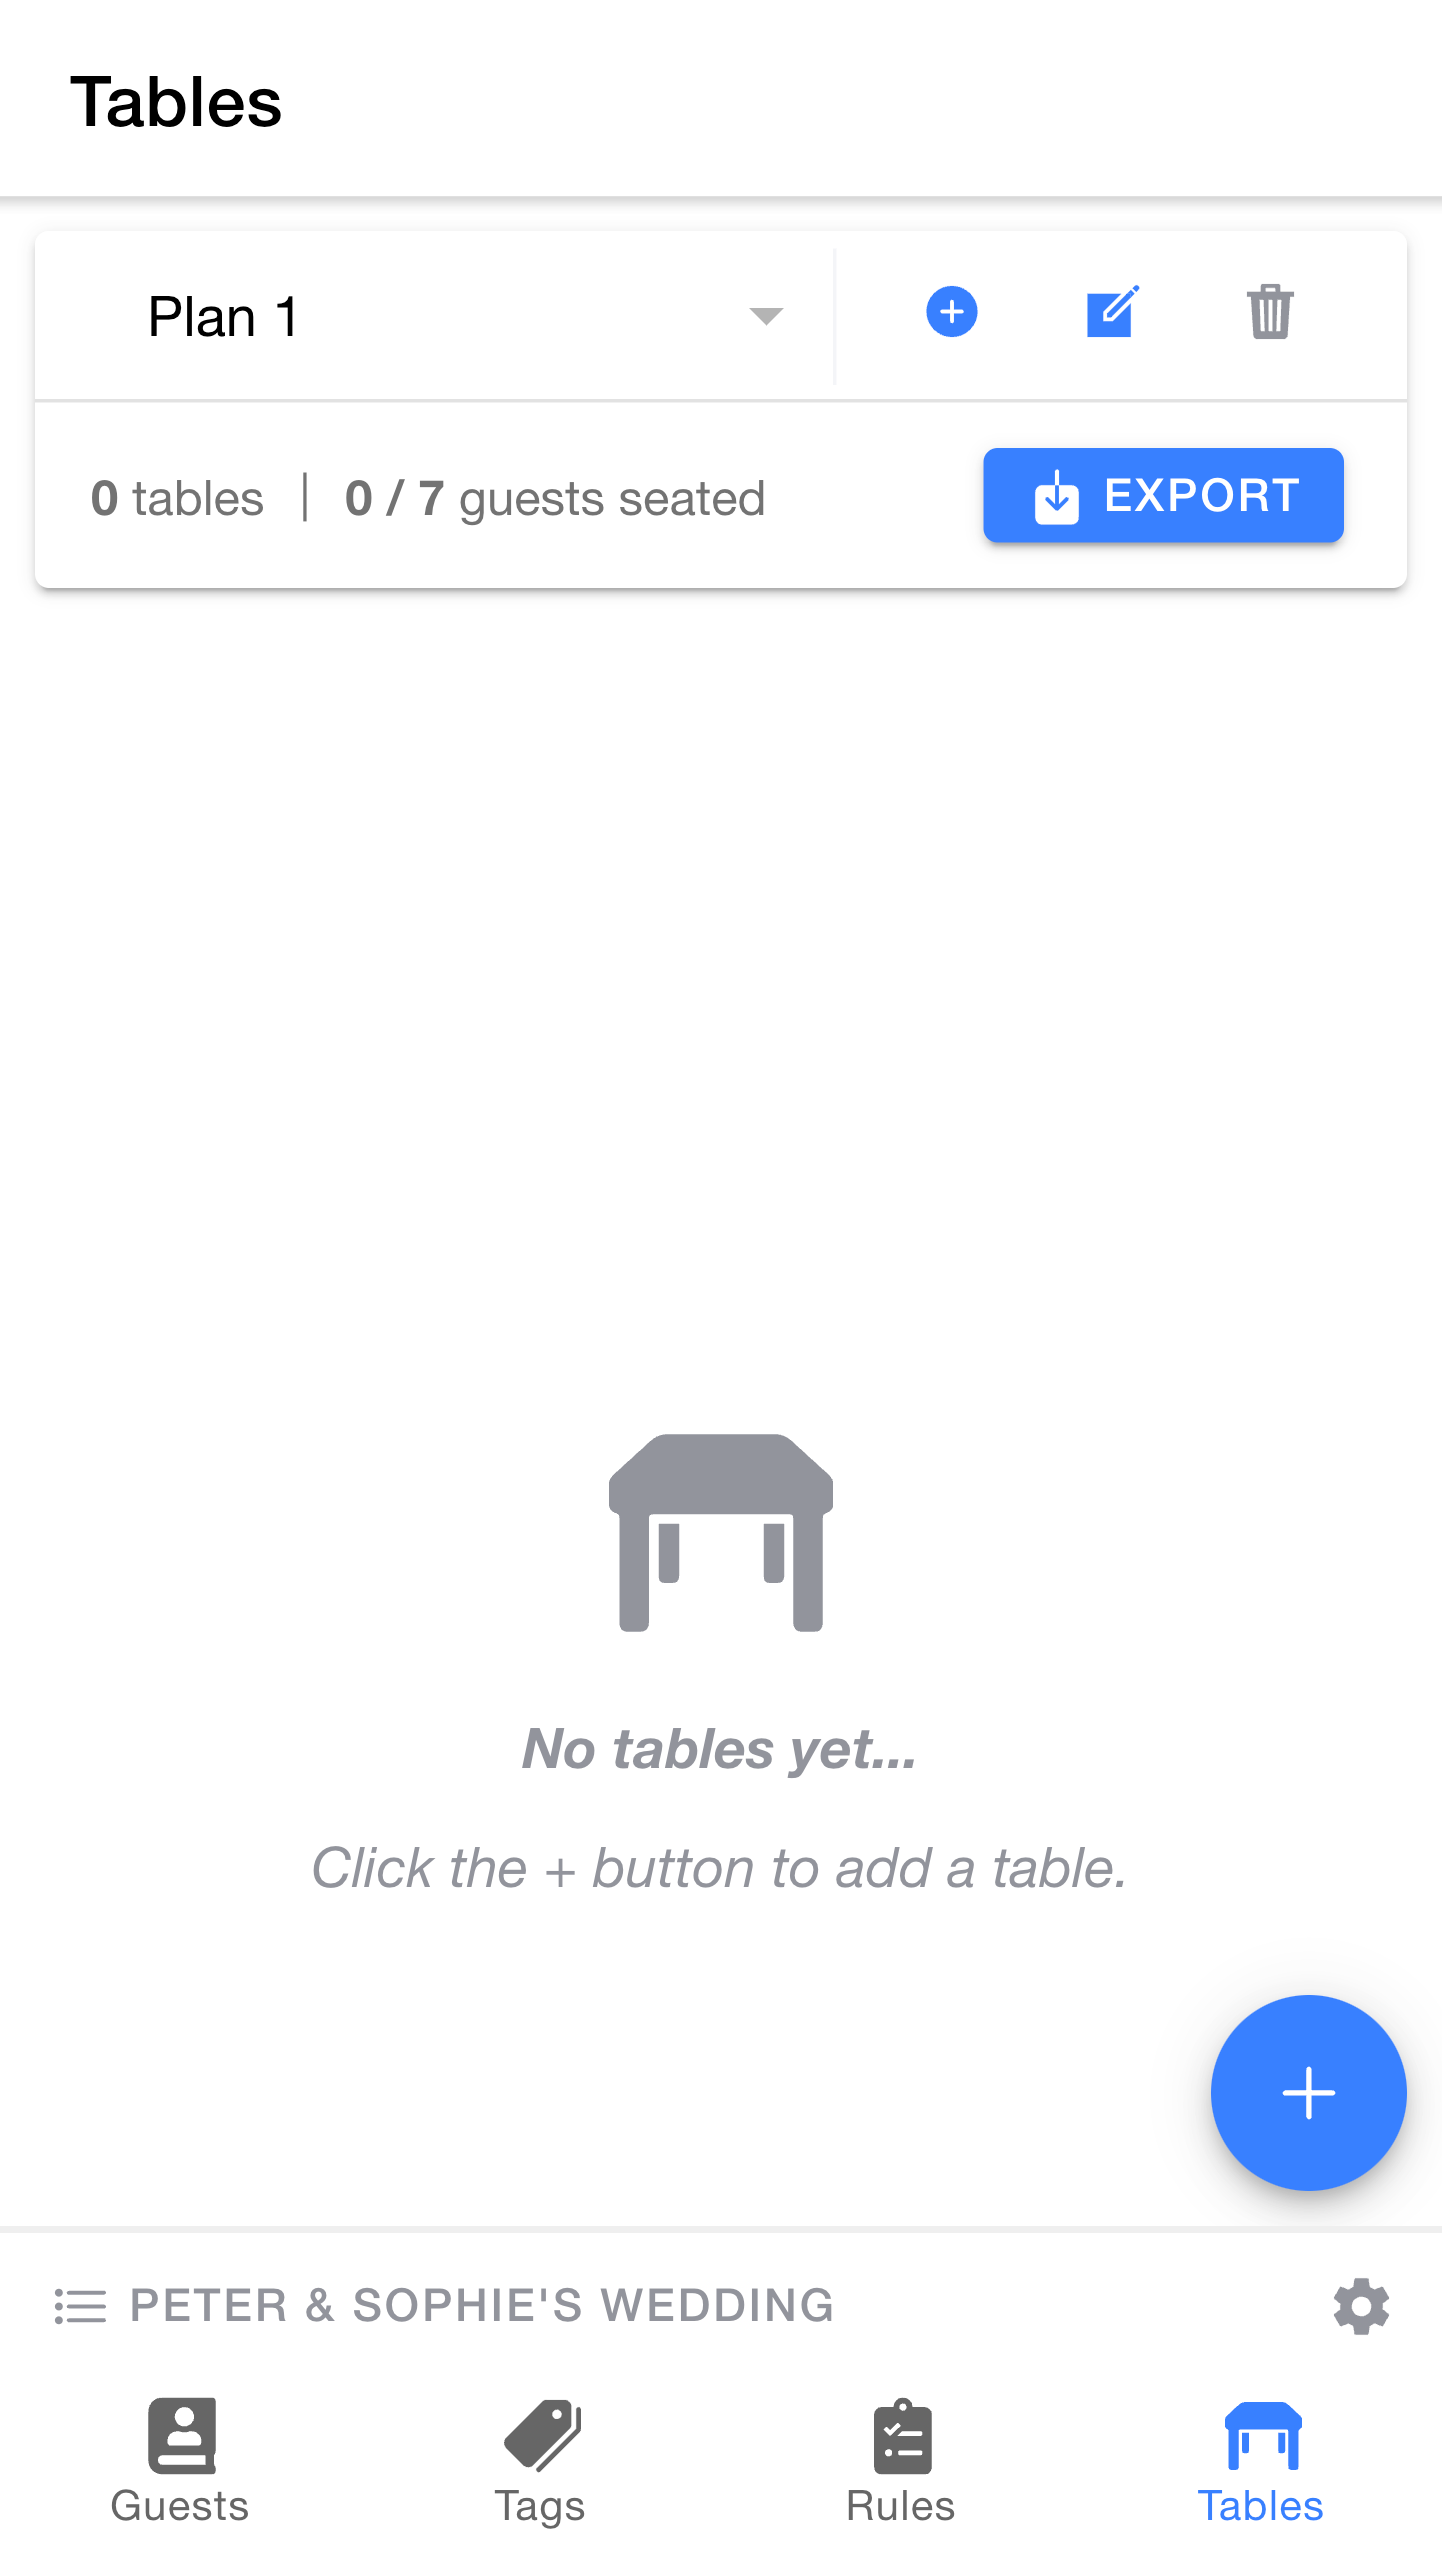
Now that we've invited our guests we'll need somewhere for them to sit.
Press Tables in the main navigation bar to view the tables page. As you'd expect, there are currently no tables to display.
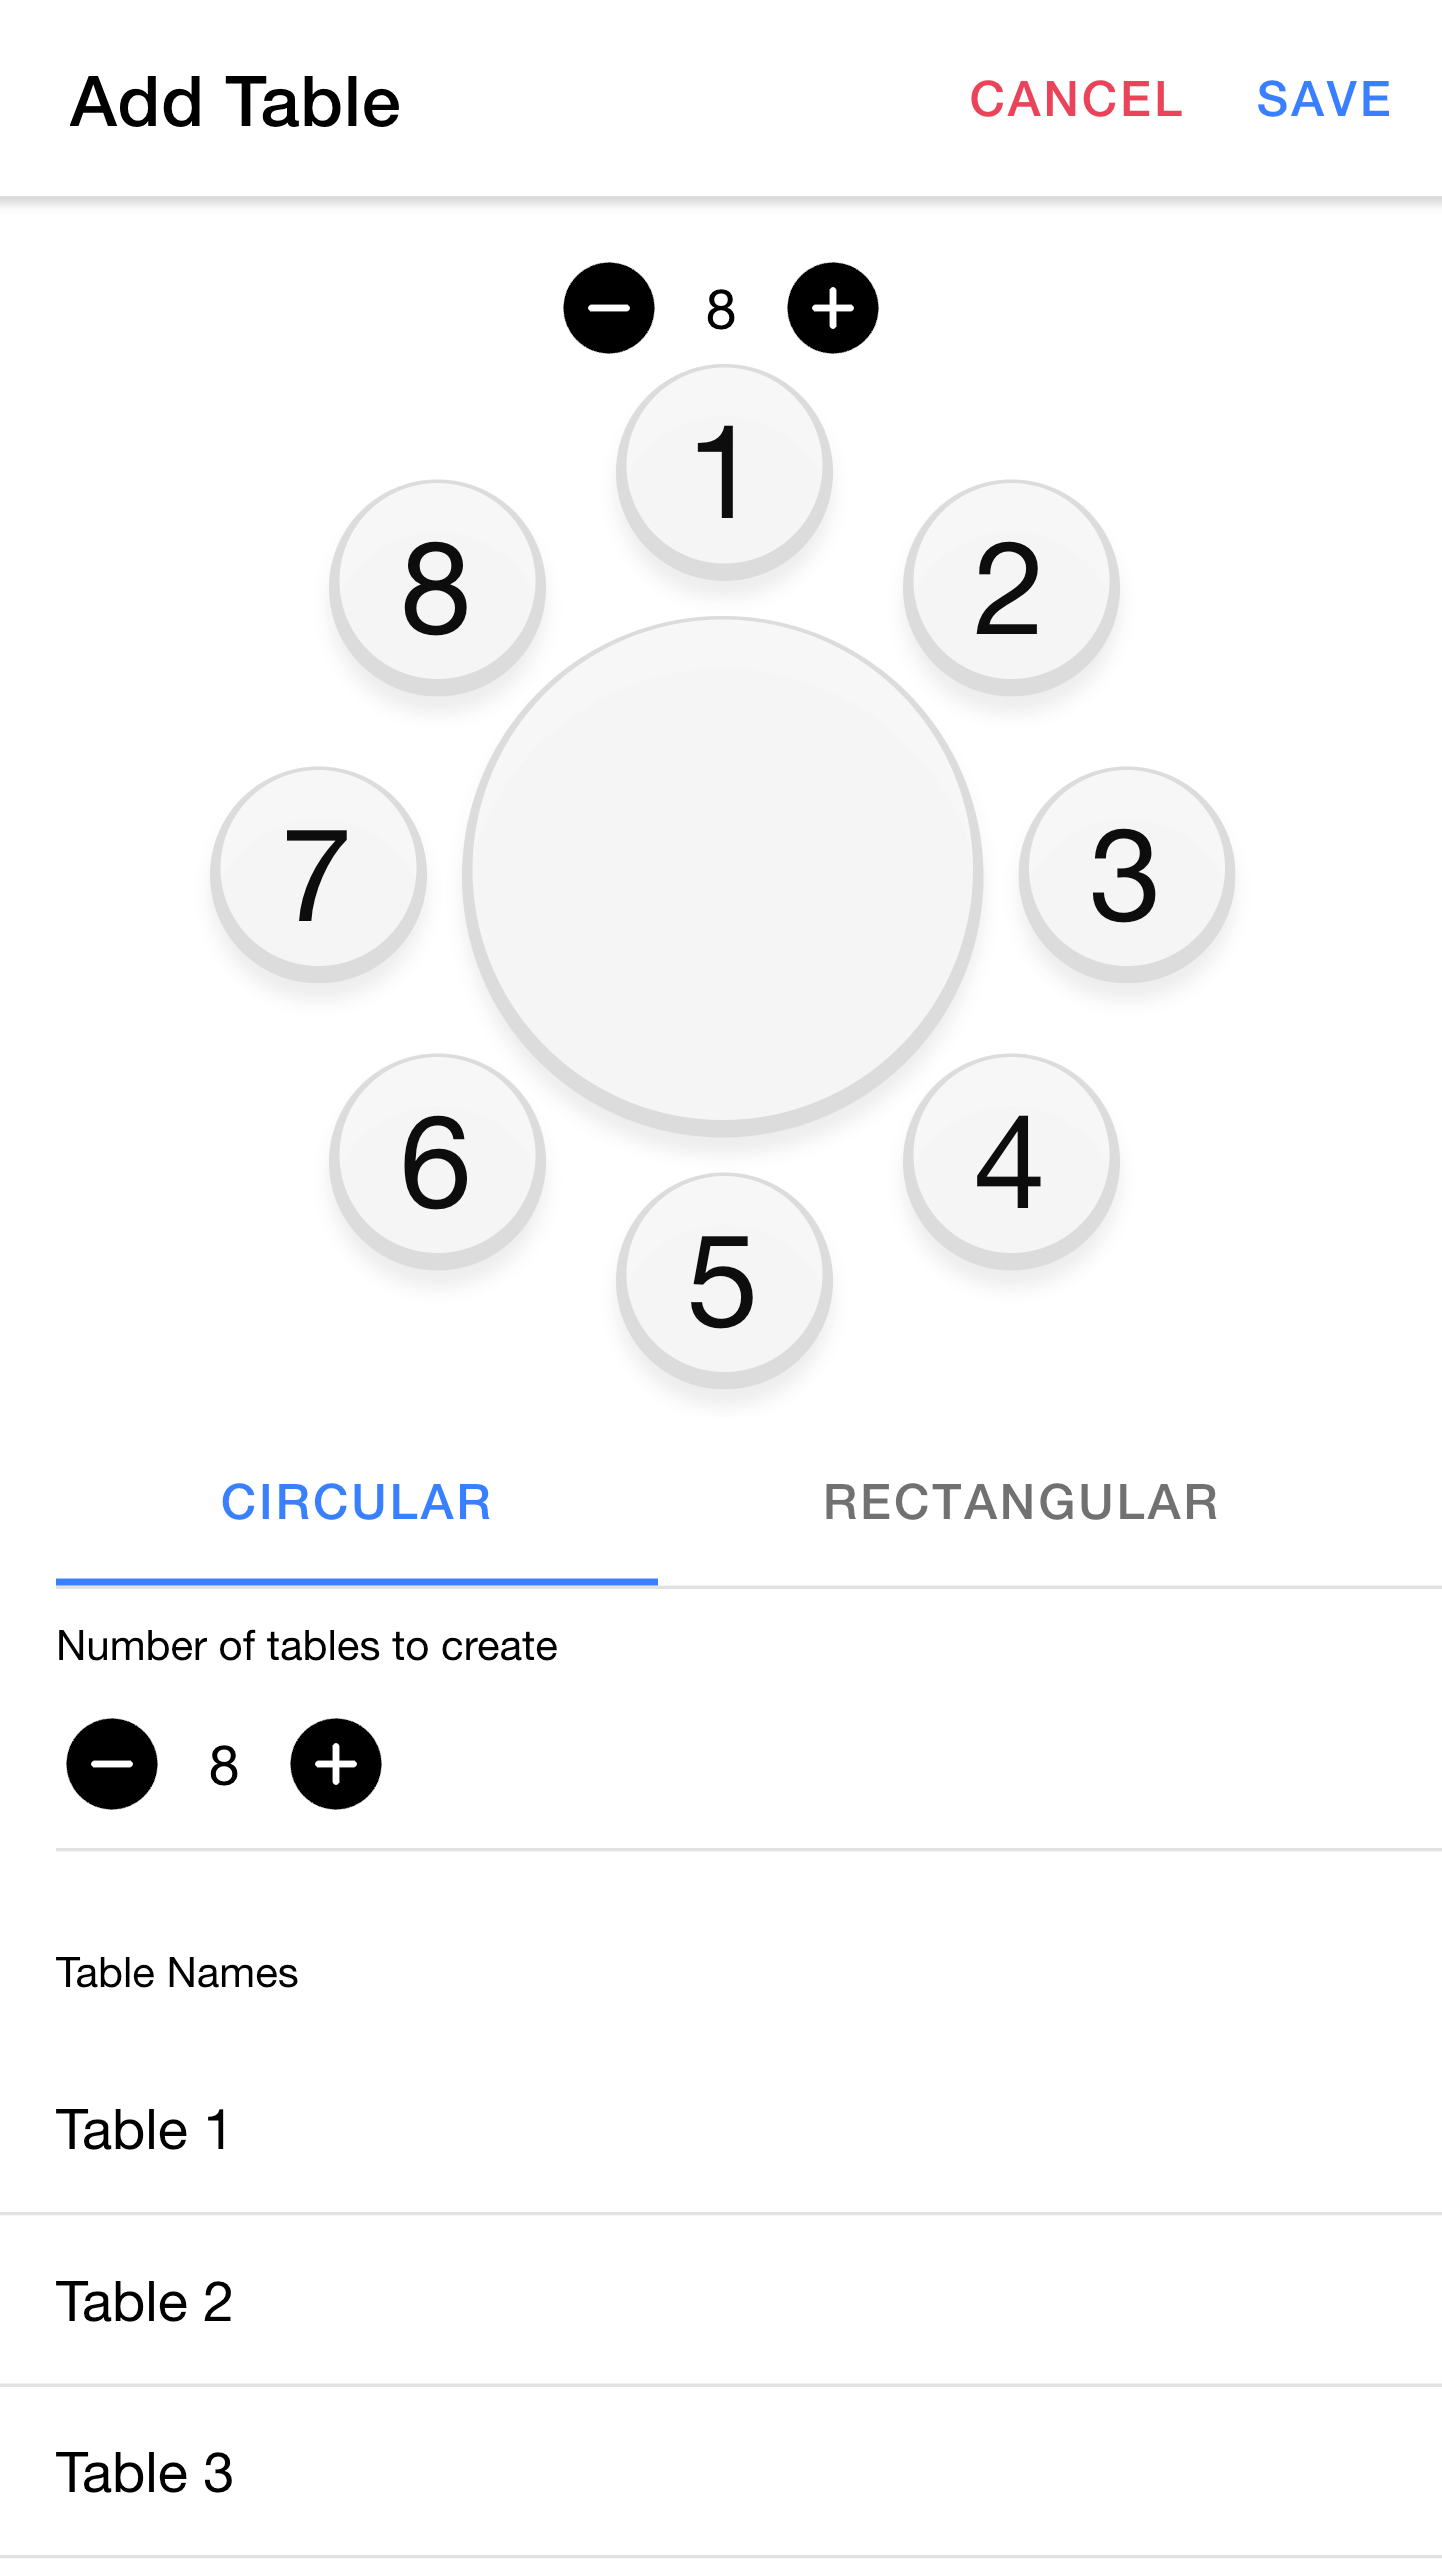
To create one or more tables, press +.
At the top of the page you can use the + / - buttons to change the number of seats, or the Circular / Rectangular toggles to change the shape of the table. For now, leave this on the defaults (circular table with 8 seats).
For number of tables to create, increase the number to 8. This allows us to quickly create multiple tables (with the same shape and number of seats) rather than adding them one by one.
The Table Names section lets you enter names for each of the tables. In our case we'll stick with the suggested defaults (Table 1, Table 2 etc.) but you can edit the names if you plan to have names for each table.
Press Save.
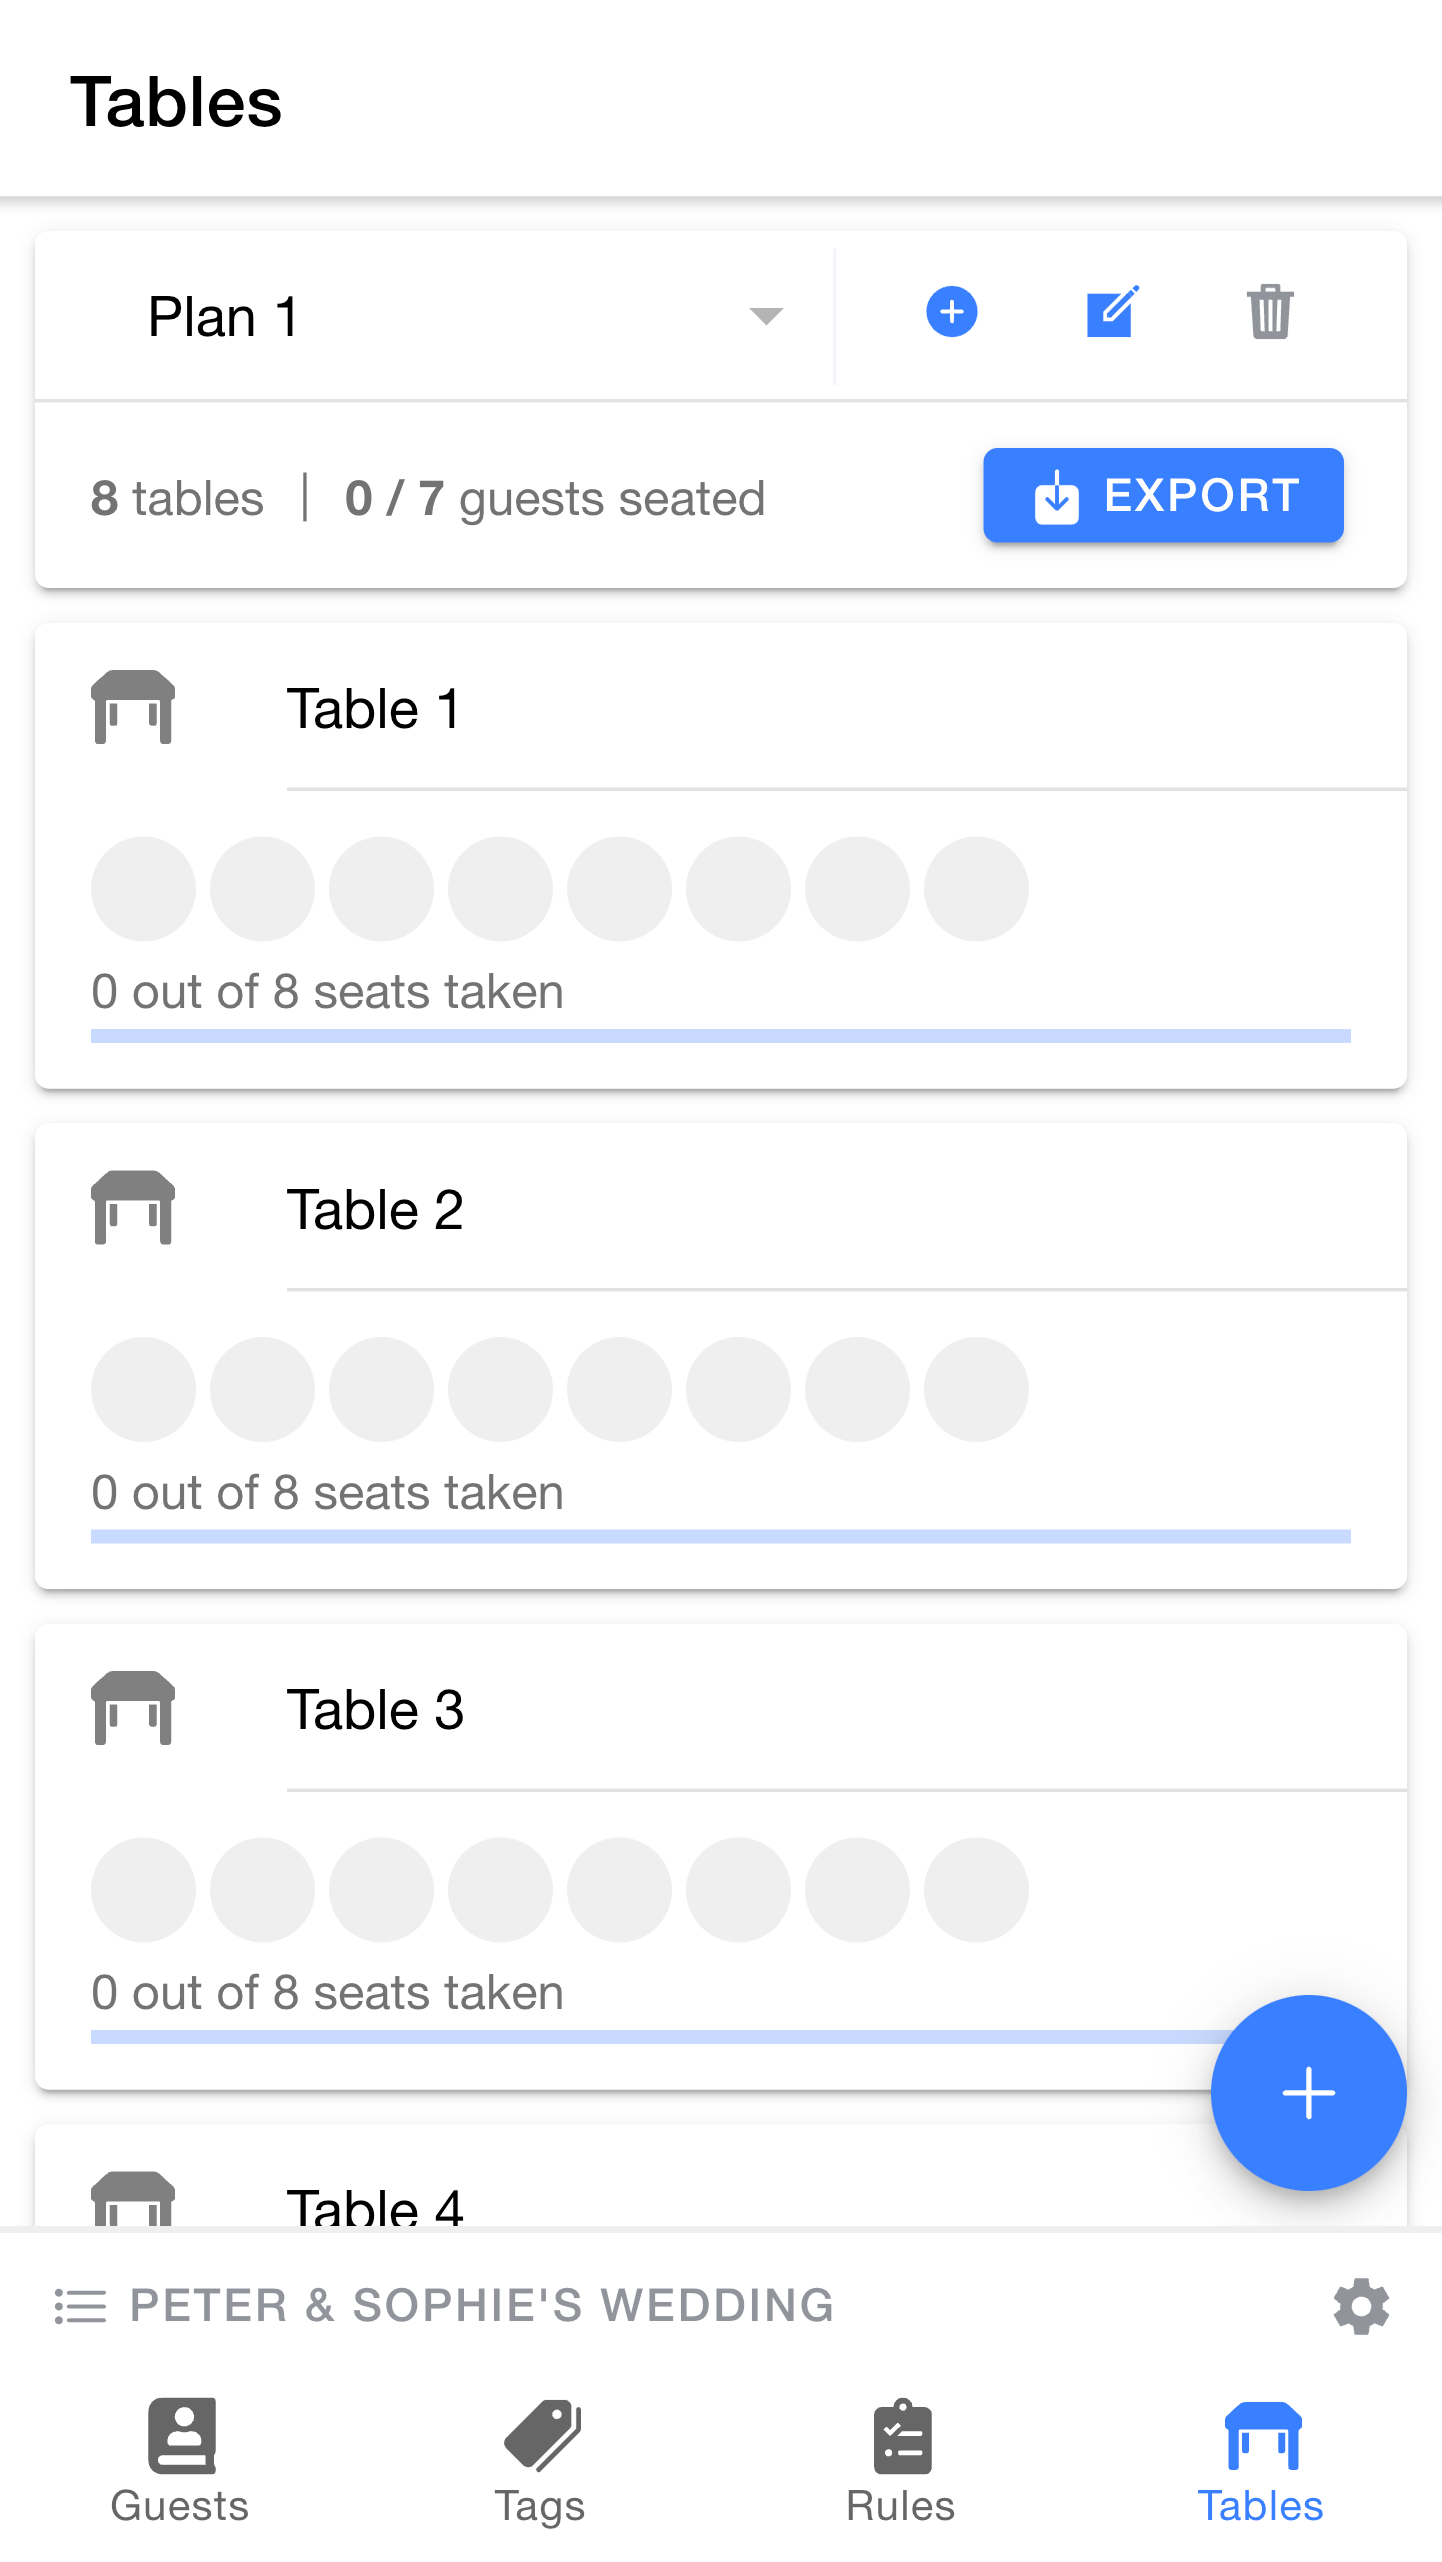
Just like that, we've created 8 tables.
As you can see, the Tables page shows a summary of the seating plan. Each of the grey circles represents an empty seat. Once we start seating our guests these will get more exciting.
At the top is the plan selector. We'll explore this in a little more detail later when we talk about plans. For now though, note that it shows the overall status - we have 8 tables and 0 guests currently seated.